shhh…sekrit
The guide
Event ticketing for independent promoters. Open to anyone with the link, honest about capacity, and your money never touches us.
This is every help page on one page. or get the ready-made PDF.
1 · Promoters
Throw your first party
From an empty dashboard to a link people can RSVP to.
Five steps, and only the first two are required before you publish.
Create → tickets → payment links → publish → share.
The Getting started list on your dashboard ticks these off as you go, and points at the next one.
Search is ⌘K (Ctrl K on Windows, or just /) anywhere in the dashboard. It finds actions, your events, any section of the event you're on, and these docs.
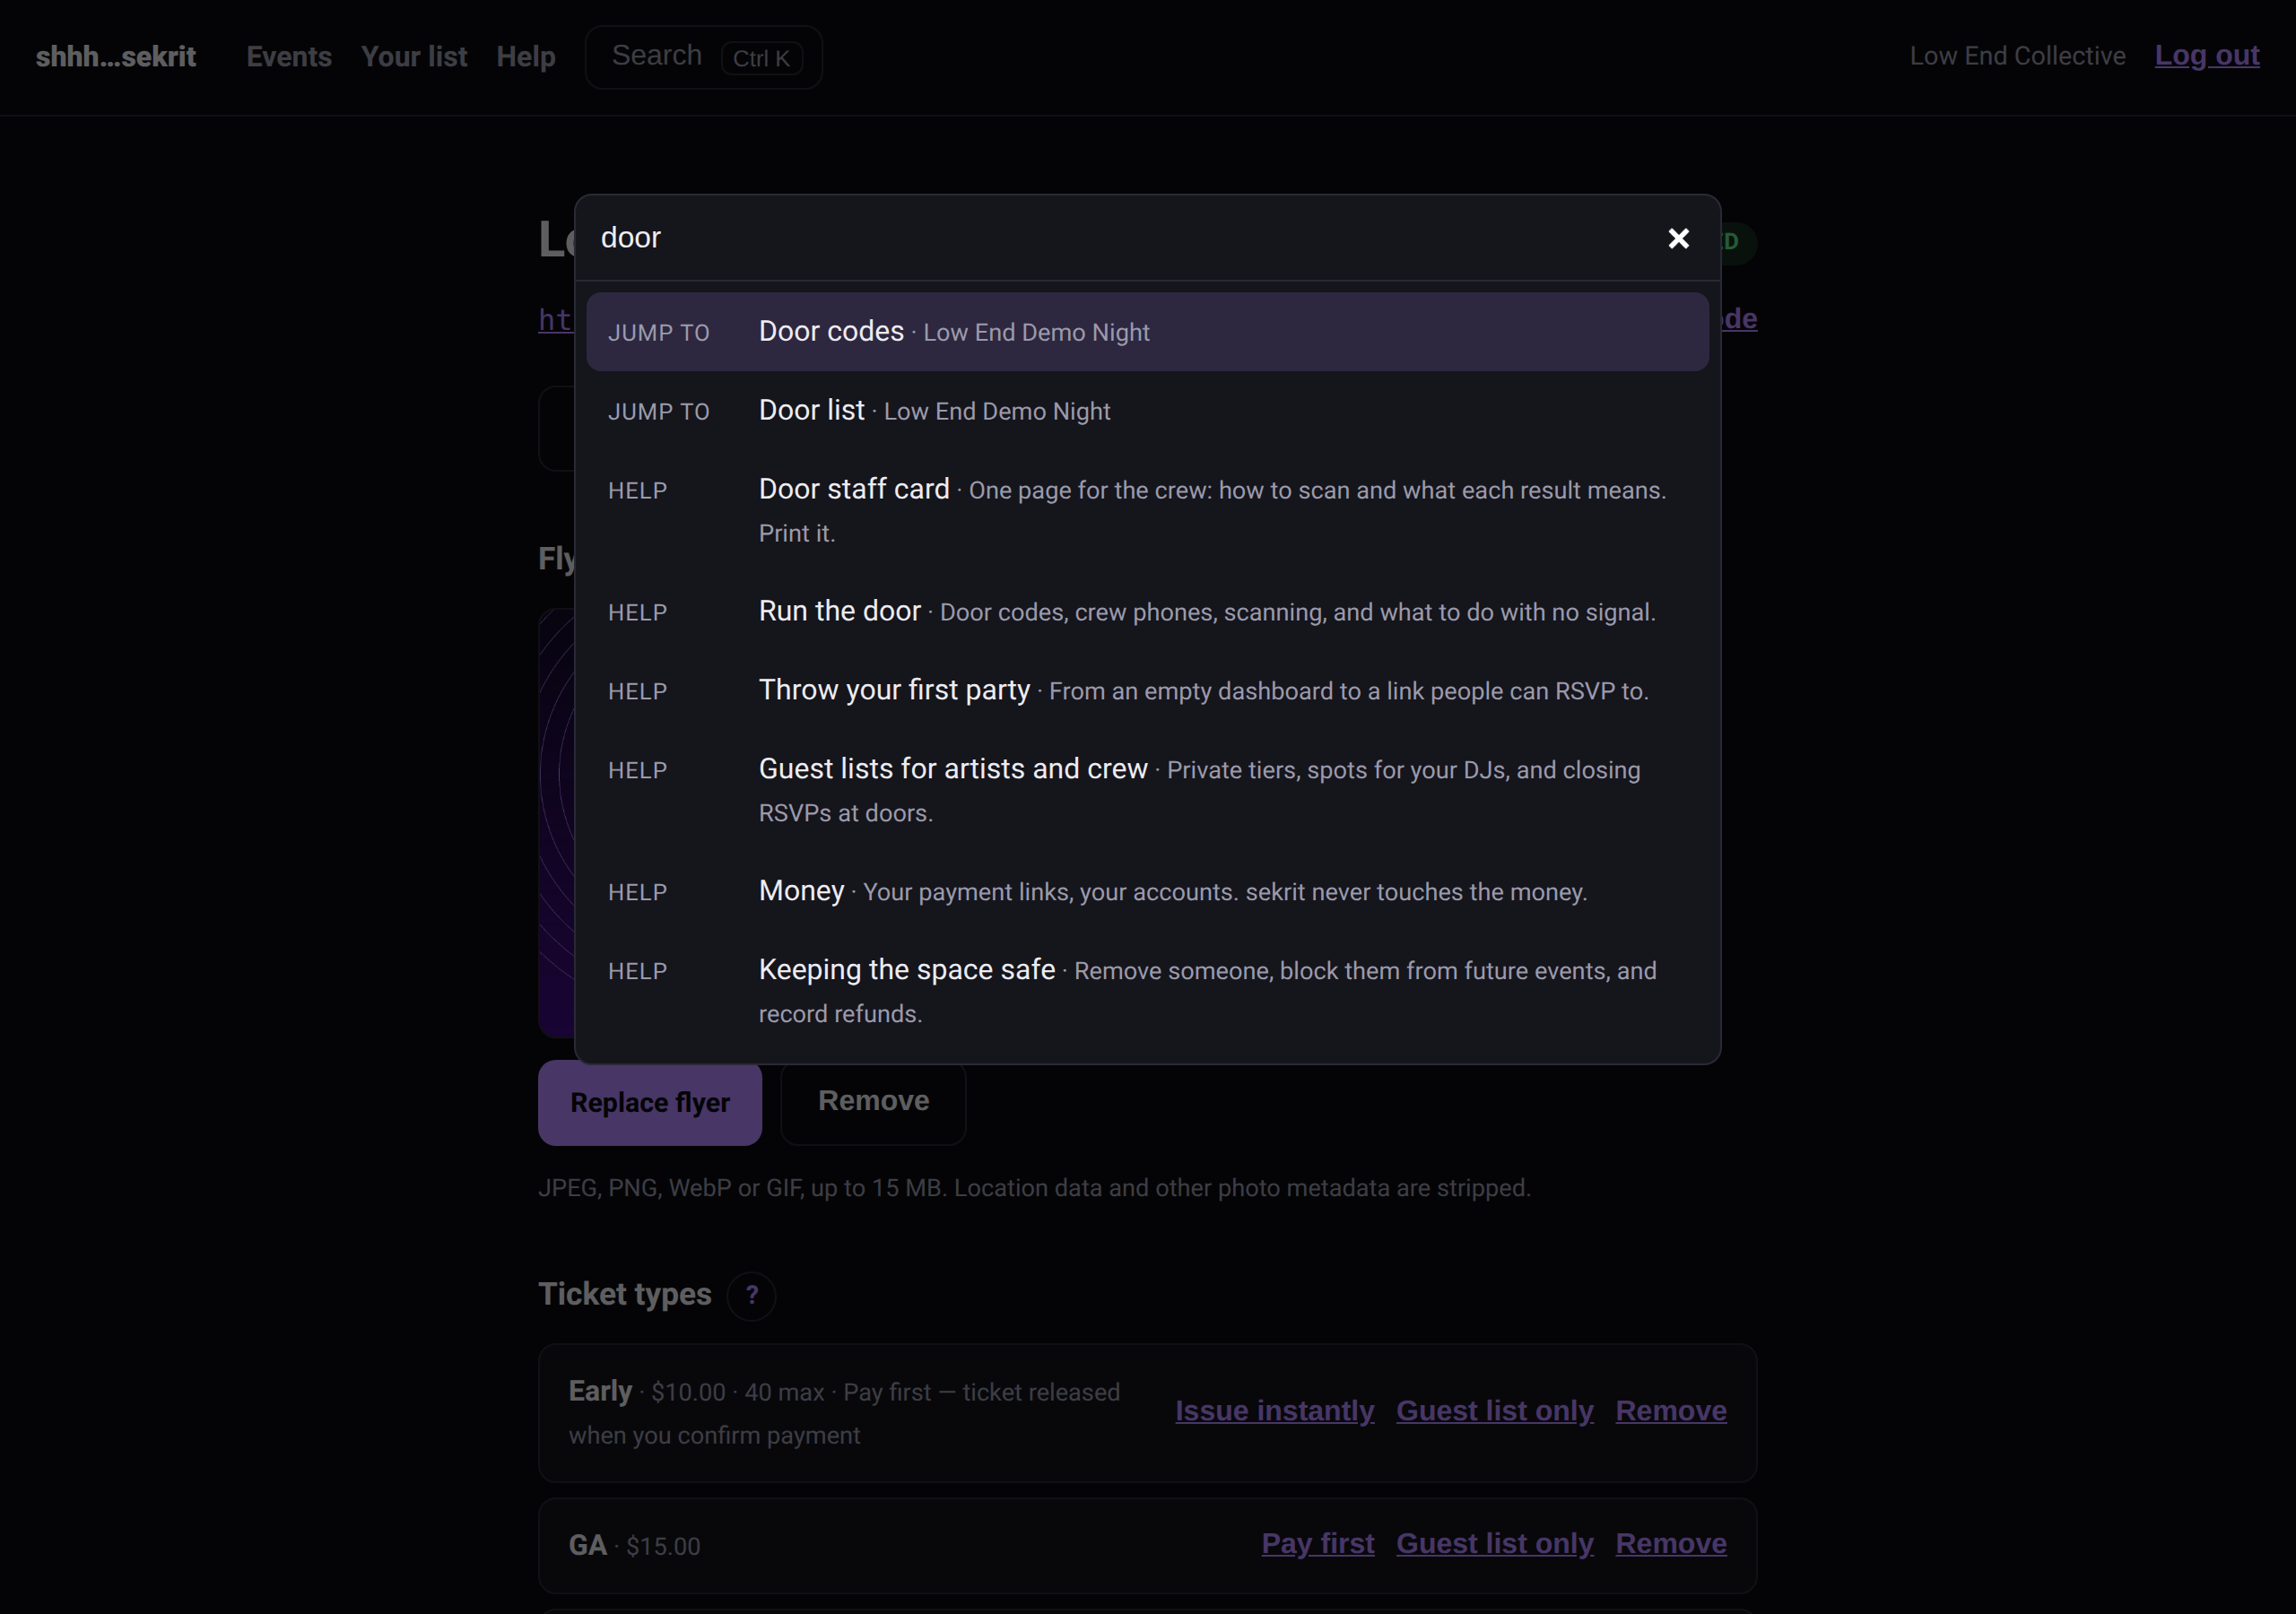 ⌘K finds sections, events and help.
1. Create the event #
On the dashboard, hit New event. Title, start time and timezone are the only required fields — everything else can come later.
- Times are in the event's timezone, not your phone's. Pick the zone the party is in and type the times as they'll read on the flyer.
- Ends the next day? Most parties do. Put the real end time and sekrit shows it as "Sat 9:00 PM – Sun 3:00 AM".
- Capacity is what the room holds. Leave it empty for no limit. The public page shows the honest number left — it's never padded to make things look scarcer.
- Public or unlisted. Unlisted means it's reachable by link only. Either way, anyone with the link can RSVP.
The event starts as a draft. Nobody can see it until you publish.
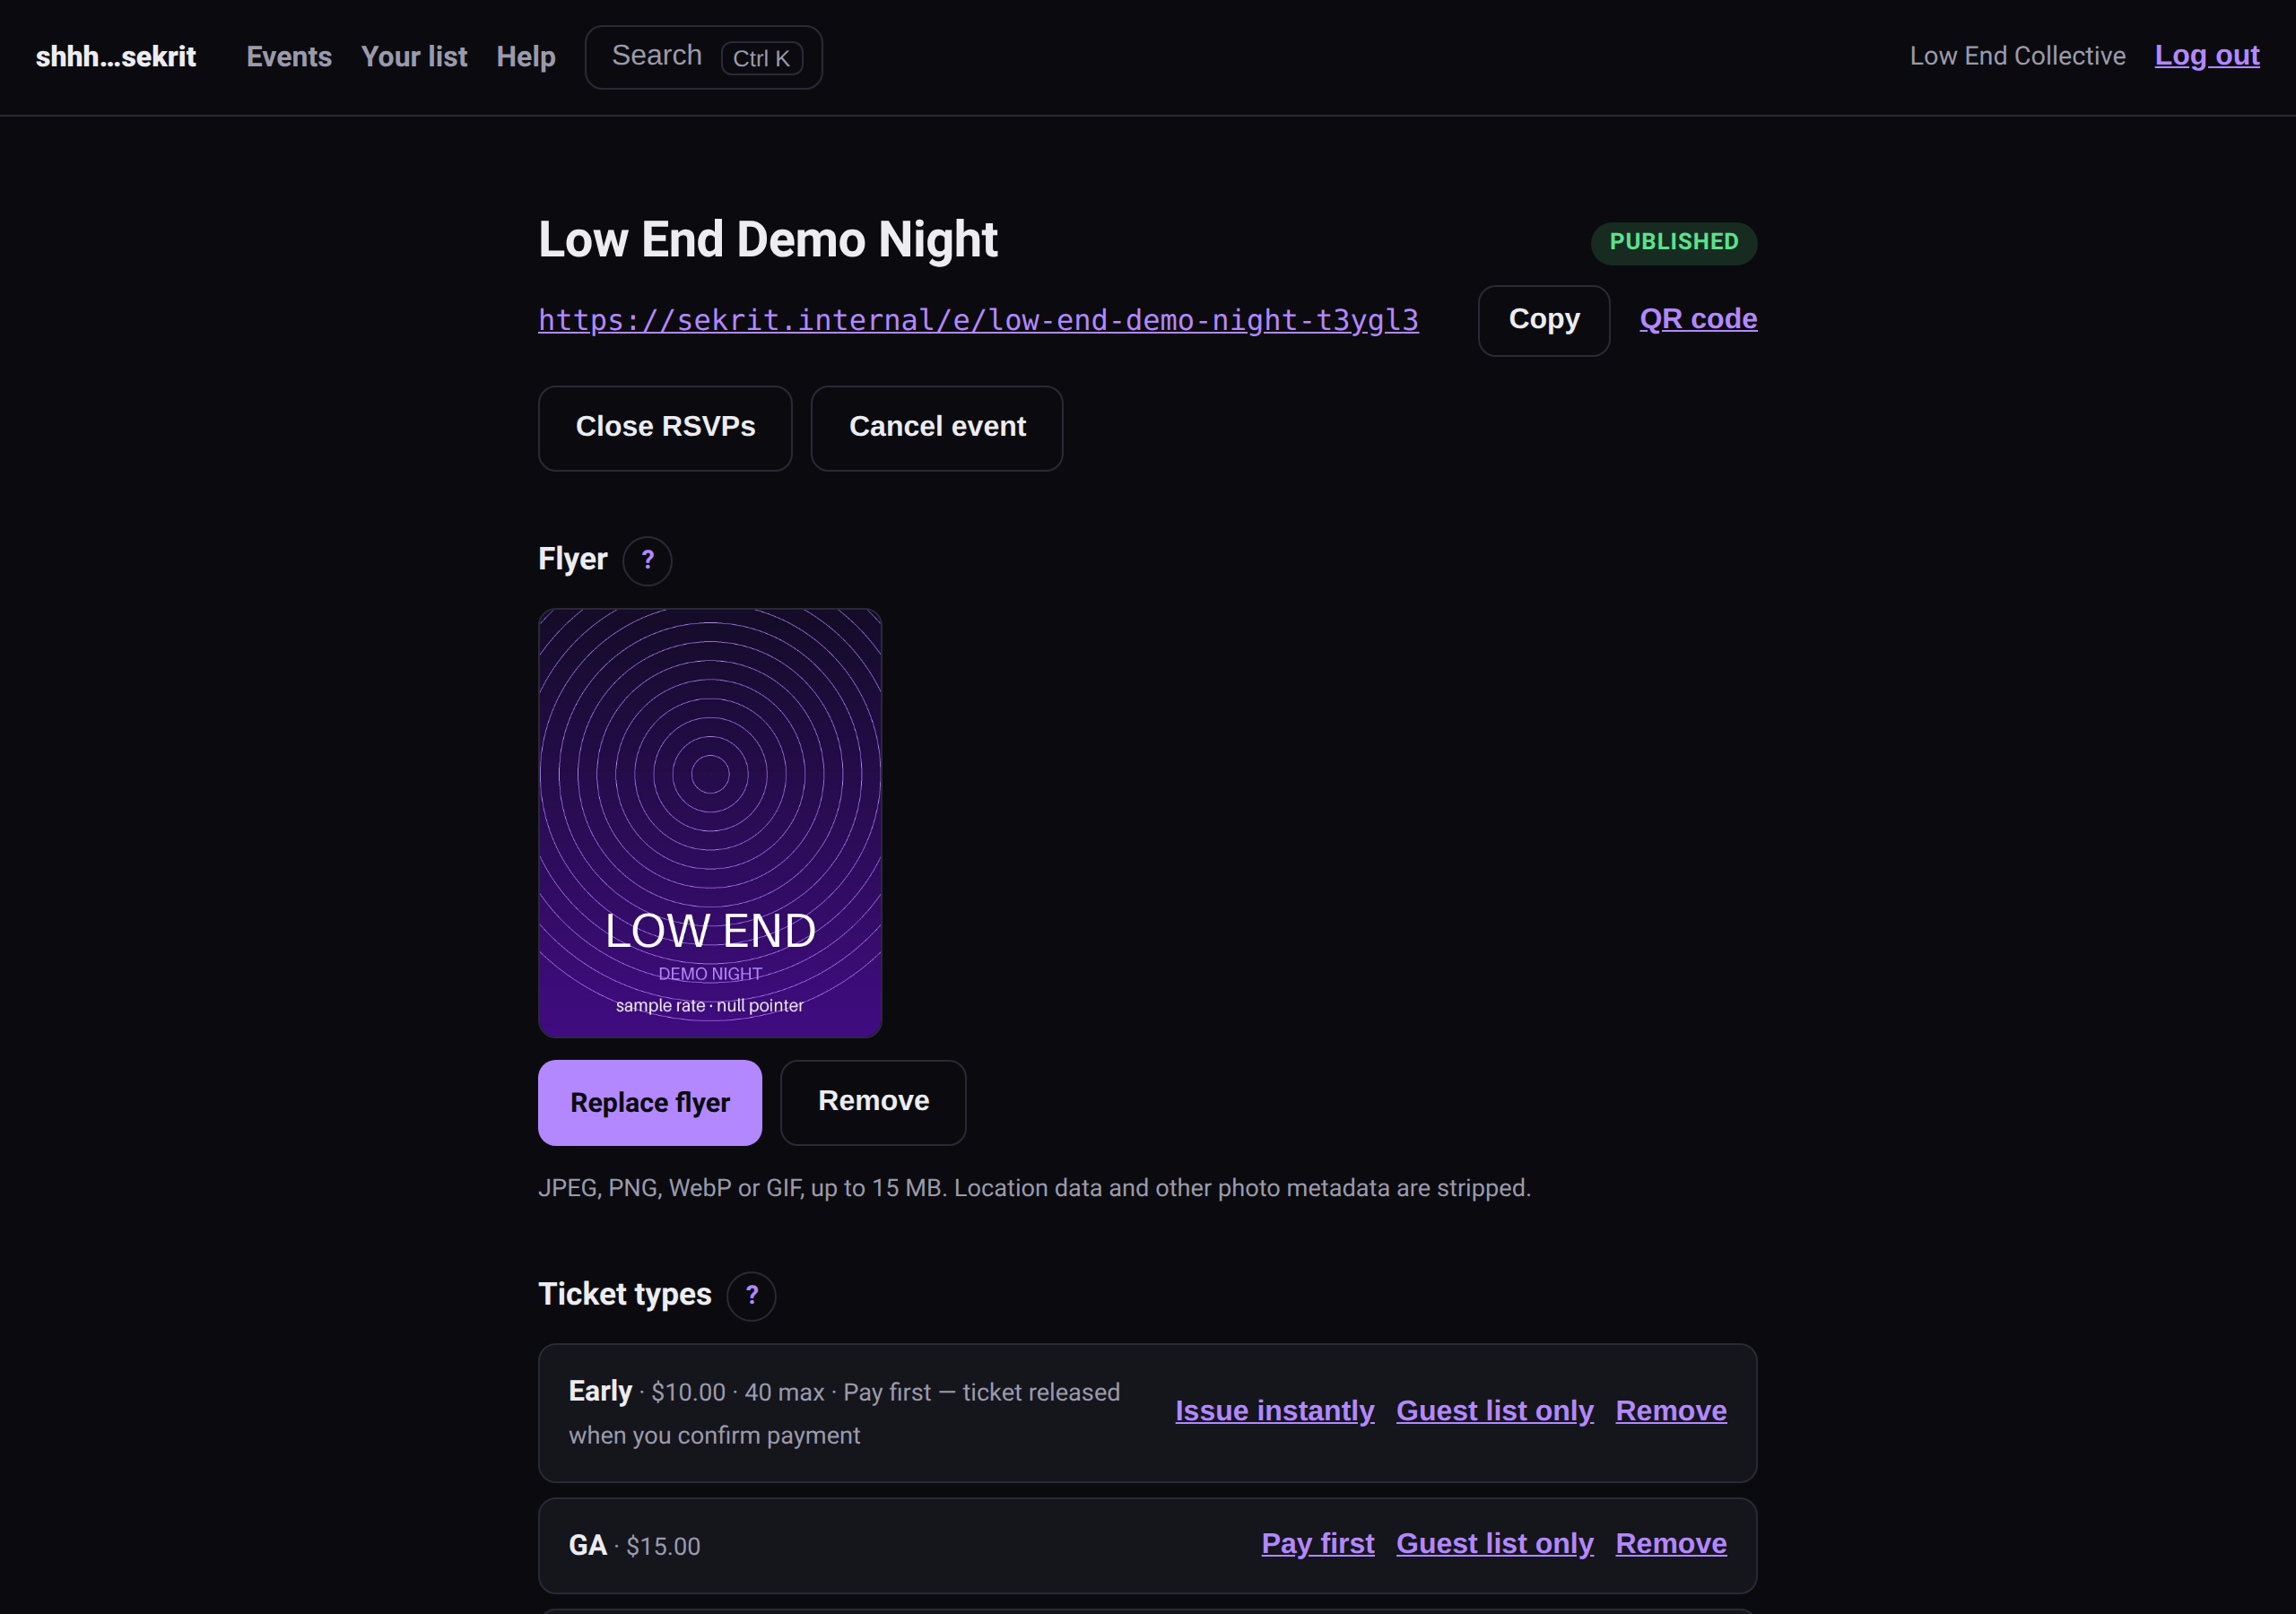
Your event's page on the dashboard. Everything about the party is set up from here.
You can add a flyer, a title font and an accent colour here too — see Flyers, fonts and formatting.
2. Add ticket types #
Under Ticket types, add at least one tier people can RSVP to — GA, Early Bird, Door, whatever you call it.
- Price is what you're asking. sekrit doesn't take payment for tickets (see Money).
- A priced ticket is paid first. People reserve it, pay you through your own payment links, and you release the ticket once the money is in your account. See Pay first. A free tier gives the ticket straight away.
- Cap limits one tier. Leave it empty and the tier shares the event's capacity.
- Guest list only hides a tier from the public page — for Artist, Crew and Comp tiers. See Guest lists.
A published event always keeps at least one public tier. An event with only guest-list tiers would be invite-only, and sekrit doesn't do invite-only.
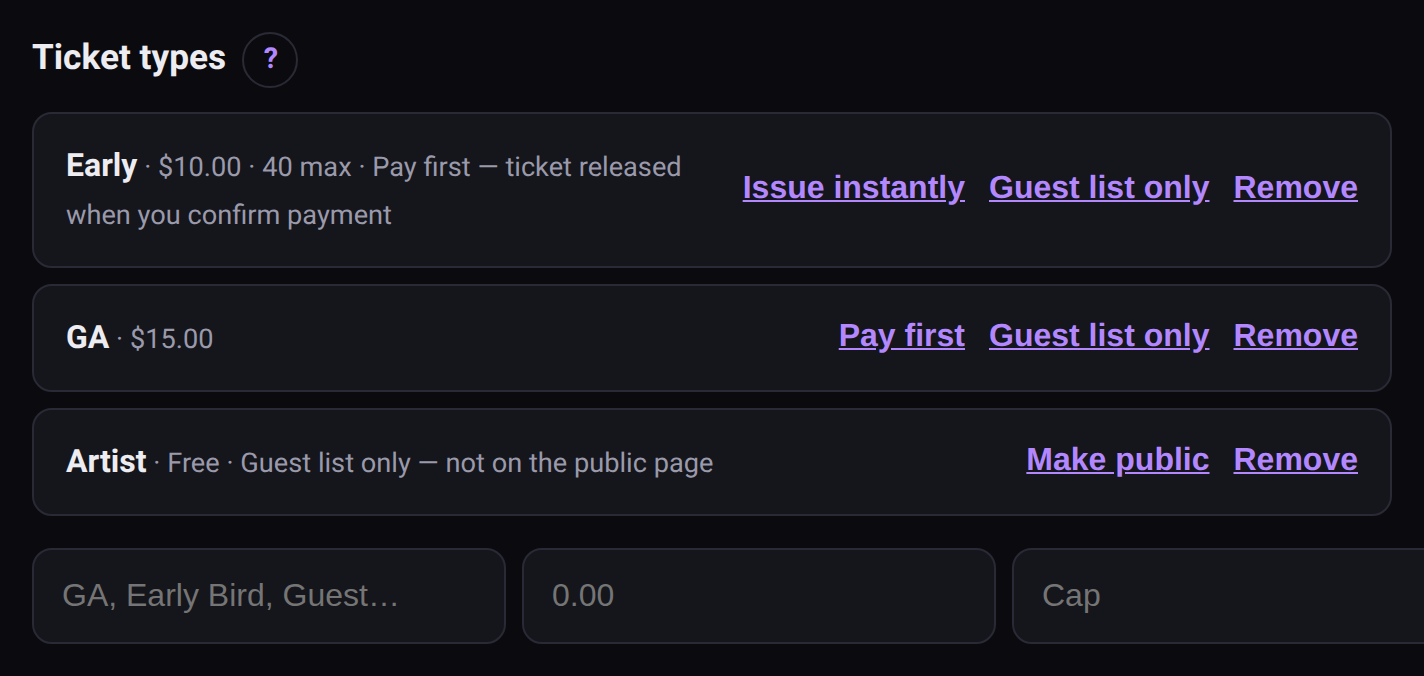 Ticket types, with a pay-first tier and a guest-list tier.
3. Add payment links (optional) #
Under Payment links, add your own Venmo, Cash App, PayPal, Zelle, Stripe or Ko-fi. They show on the event page and on everyone's ticket. The money goes straight to you — see Money.
4. Publish #
Hit Publish. The event page goes live at its link, and the notice says so. From here:
- Edits go live immediately. Fix a typo, swap the flyer, change the time.
- Cancel event is for when it's really off. It can't be undone: the page says the event was cancelled, tickets stop working at the door, and the payment links come down.
5. Share the link #
The event's link sits right under its title on the dashboard, with Copy, Share (on phones), and a QR code you can download for the flyer. The link is the whole distribution — paste it in the group chat, the story, the flyer.
What people see #
Someone opens the link, picks a tier, types their name and email, and gets their ticket on screen right away — a QR code and a typed code, with your payment links under it. No account, no app. There's an unticked box to hear about your future events, and only people who tick it are subscribed to your list.
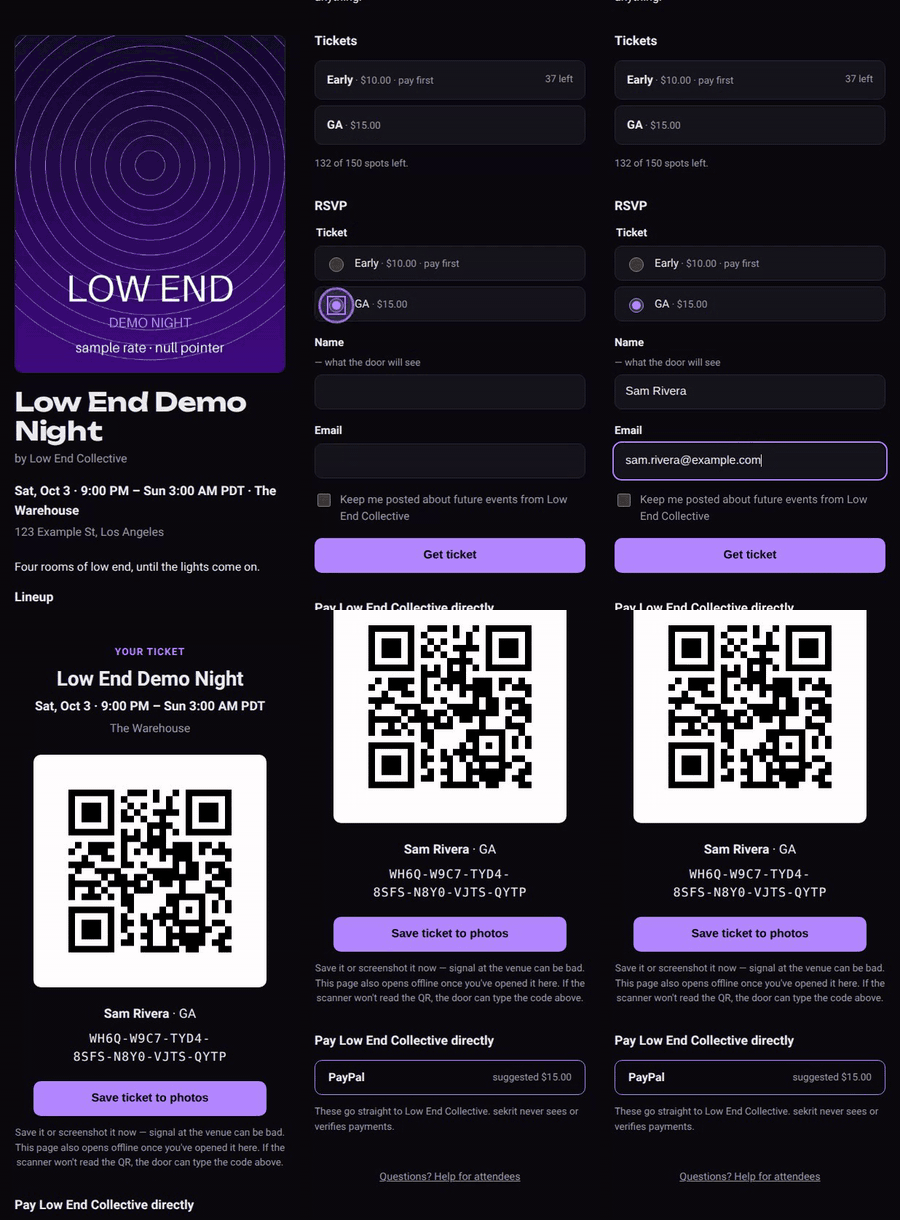 The whole thing, start to finish.
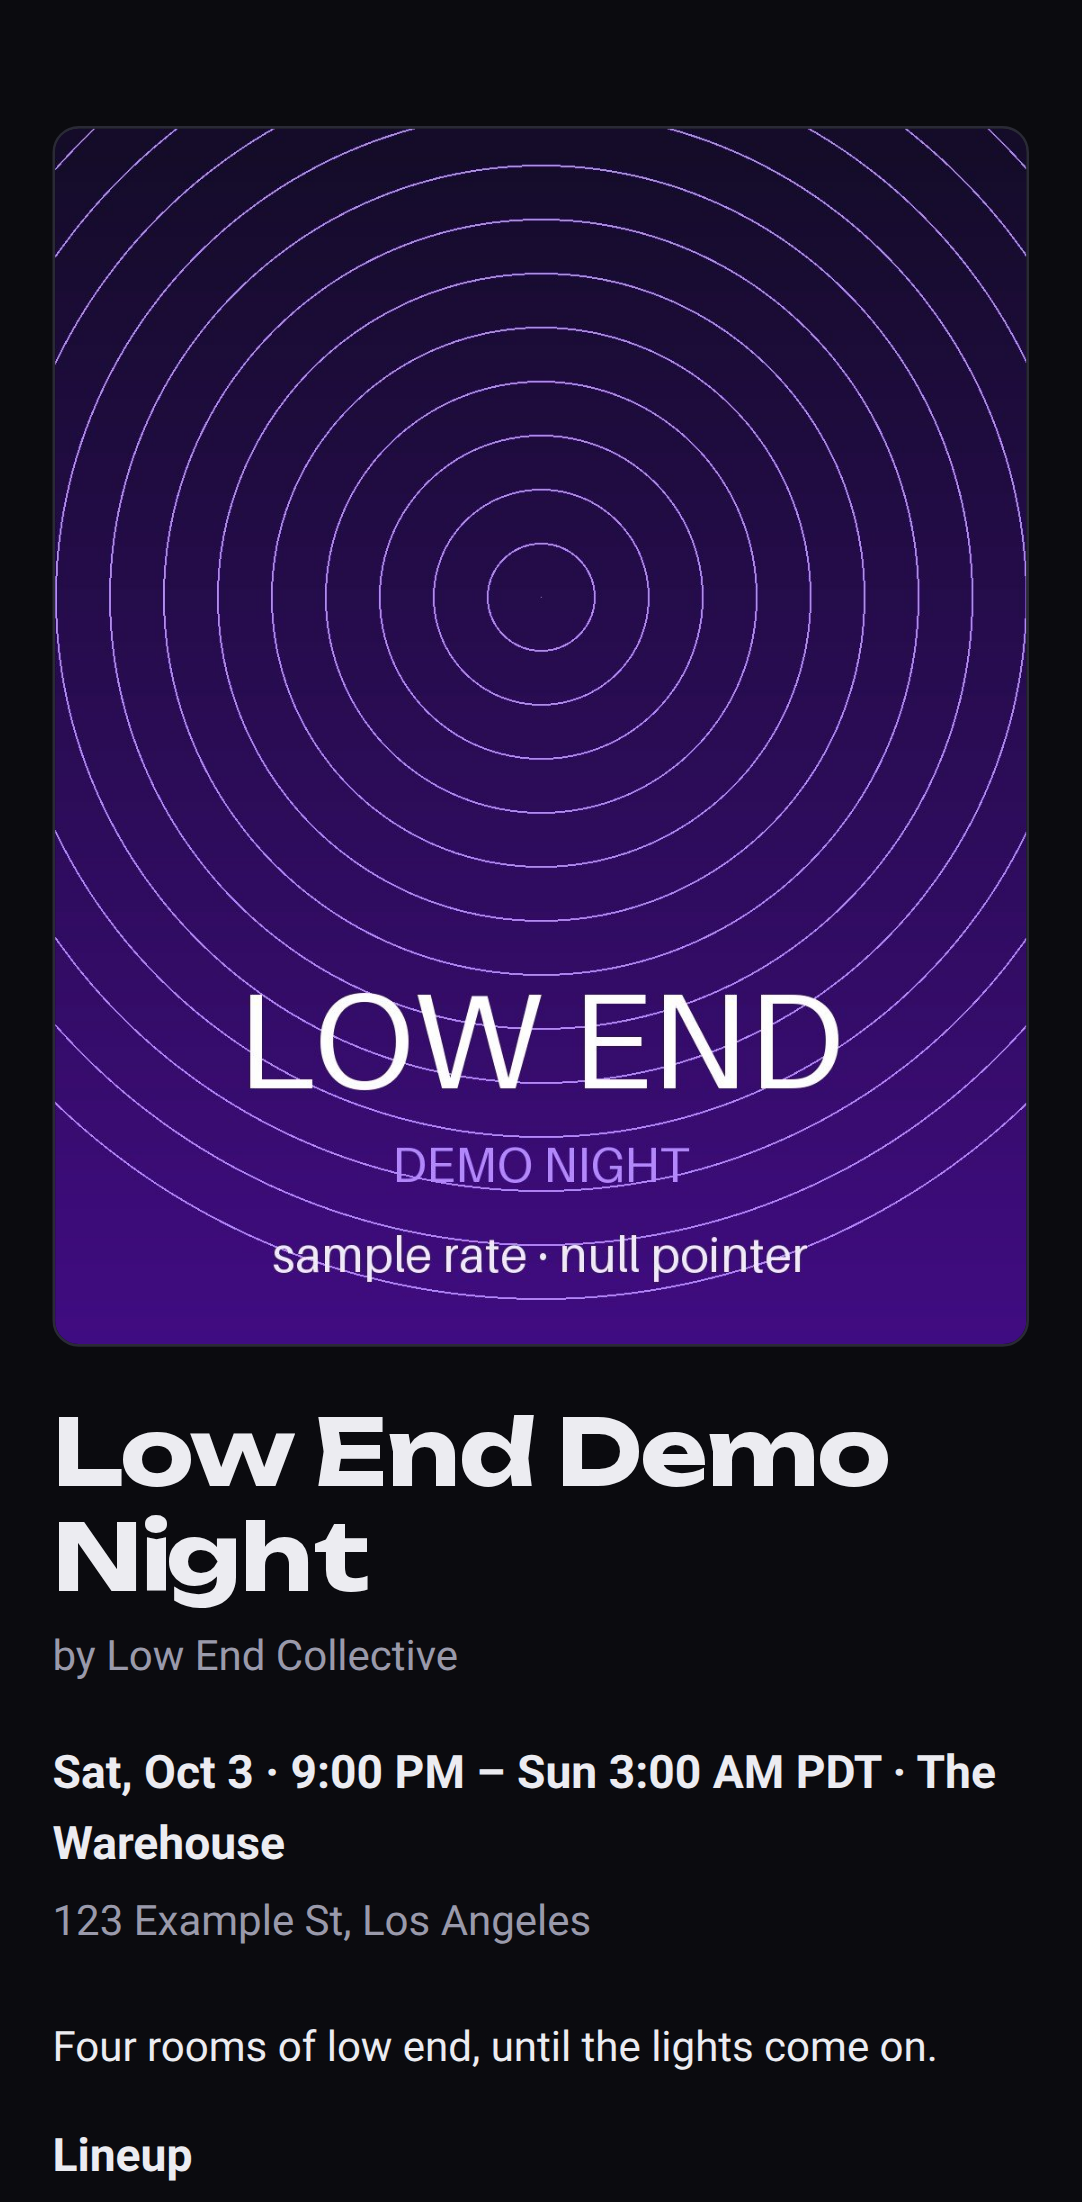 The event page, as people see it on their phone.
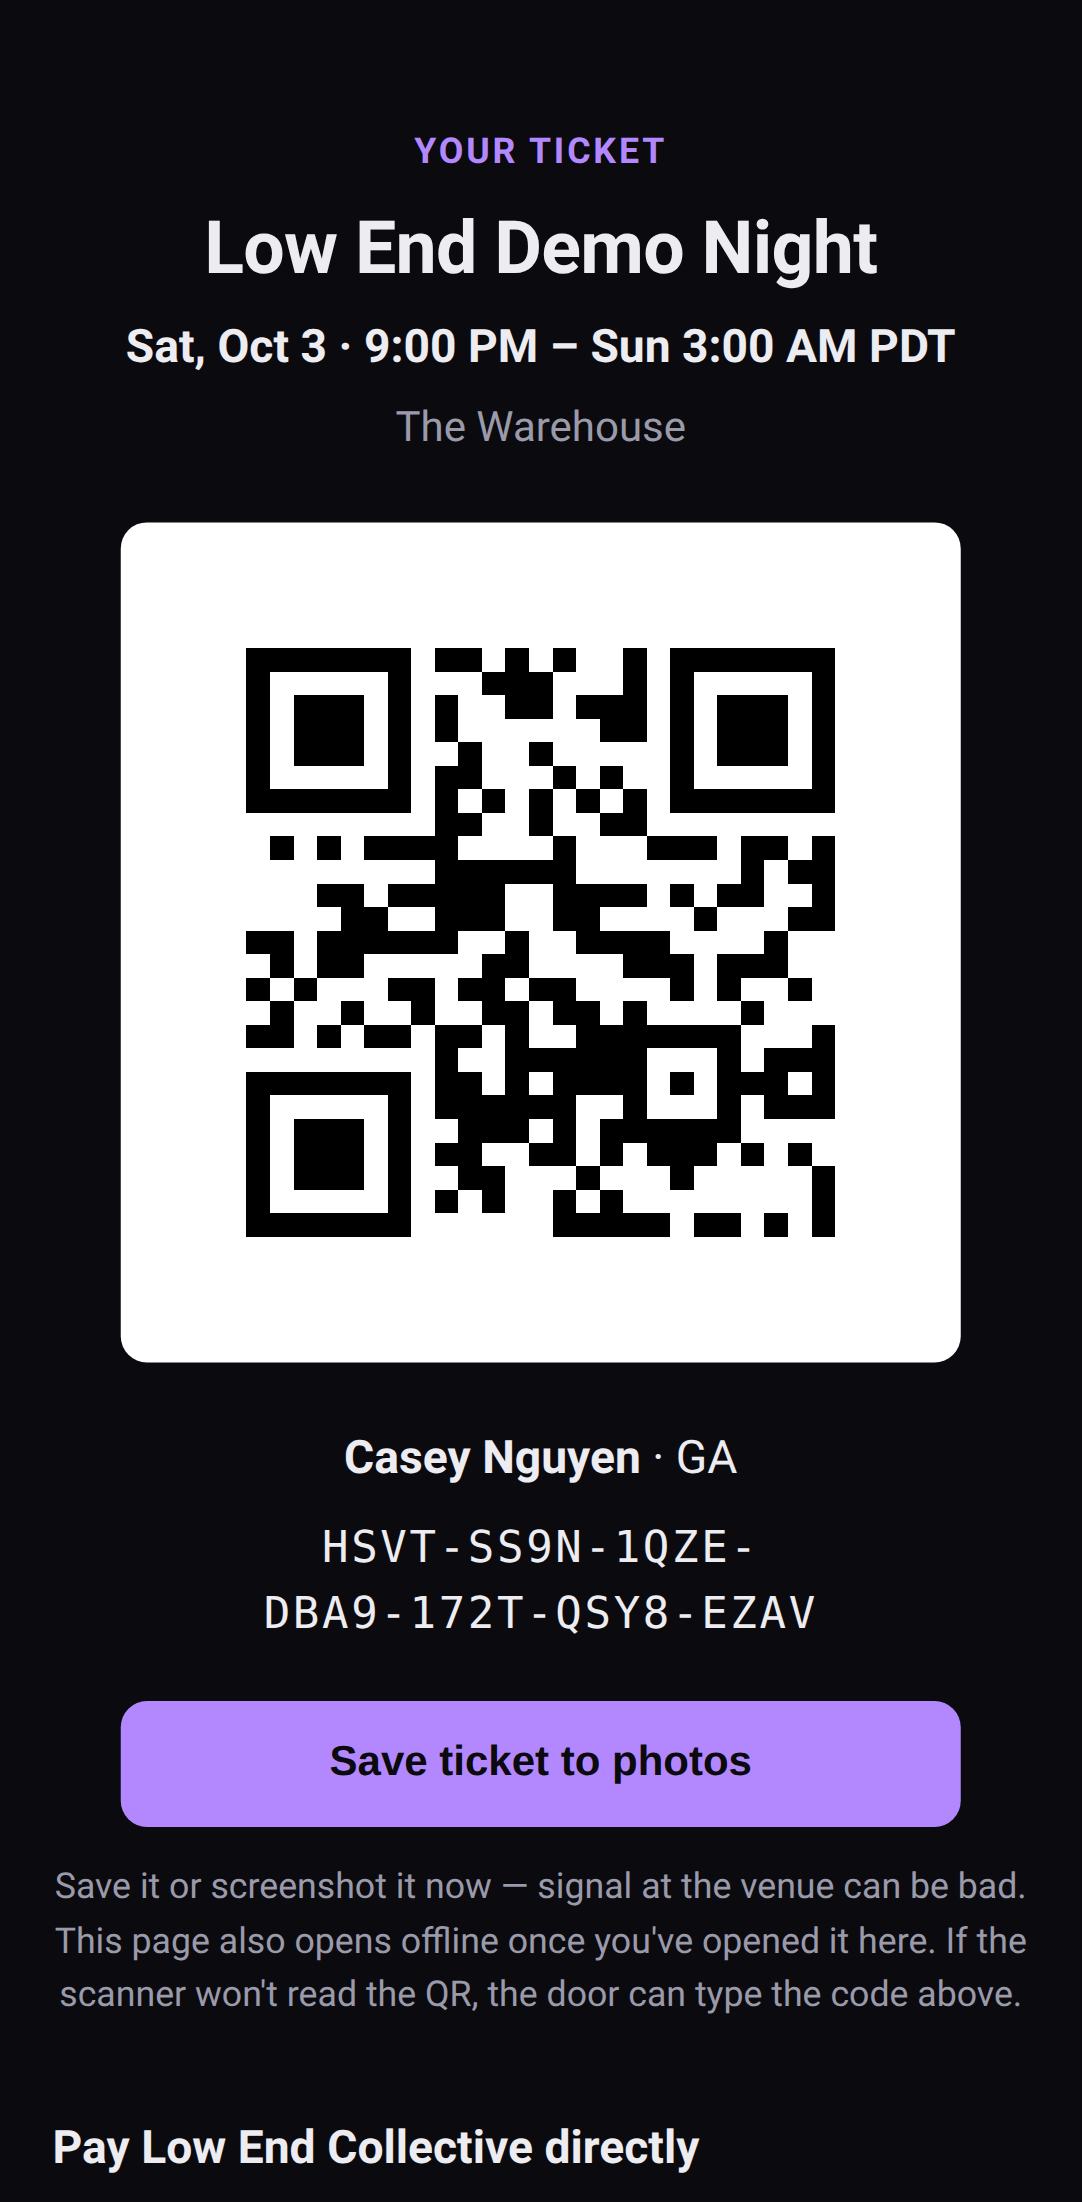 Their ticket: a QR code and the typed code under it.
Next: Run the door.
Door-only events #
Some venues sell tickets at the door and nowhere else. Tick Door only when you create or edit the event, and RSVPs become a headcount instead of tickets.
- People say they're coming, and how many they're bringing. They get a thank-you page with the flyer, the details and your links. It reminds them that tickets are sold at the door on the day. Nobody gets a ticket or a QR code.
- Ticket types are door prices. Add Door, $20 and it shows as the price at the door. Nothing is sold ahead, so you don't need a payment link. Any you add show as ways to pay at the door.
- You see the headcount under Coming on the event page: how many RSVPs, how many guests they're bringing, and the total, with a list you can download.
- Capacity doesn't apply. It's a headcount, not a limit, so nobody is told the event is full.
- People can take themselves off. Their thank-you page has I can't make it any more, which keeps your count honest.
An event can go door only any time before anyone has a ticket or an order.
2 · Promoters
Guest lists for artists and crew
Private tiers, spots for your DJs, and closing RSVPs at doors.
Artists, crew and comps get in without taking the public's places or showing up as a tier anyone can RSVP to.
Guest-list tiers #
Mark a ticket type Guest list only when you add it, or switch an existing one. A guest-list tier:
- isn't on the public page, and nobody can RSVP to it with the link
- still counts against capacity, because crew are real people in the room — the public "spots left" stays honest
- is issued only by you (from the door list) or by an artist from their own list
A published event always keeps at least one public tier. Hiding the last one, or deleting it, is refused — an event with only guest-list tiers would be invite-only through the back door.
Adding guests yourself #
On the Door list, use Add a guest: a name, a guest-list tier, and an email if you have one. A +1 at the door rarely has an email, and that's fine — they're on the list by name.
Guests you add count toward capacity but aren't blocked by it. It's your door.
Giving an artist their own list #
Under Guest lists, make one for each artist or crew member:
- Who's it for? — "DJ Foo", "Door crew".
- Tier — which guest-list tier their guests get.
- Spots — how many people they can add.
That gives you a private link (and a QR). Send it to them — only them, because anyone with it can edit that list.
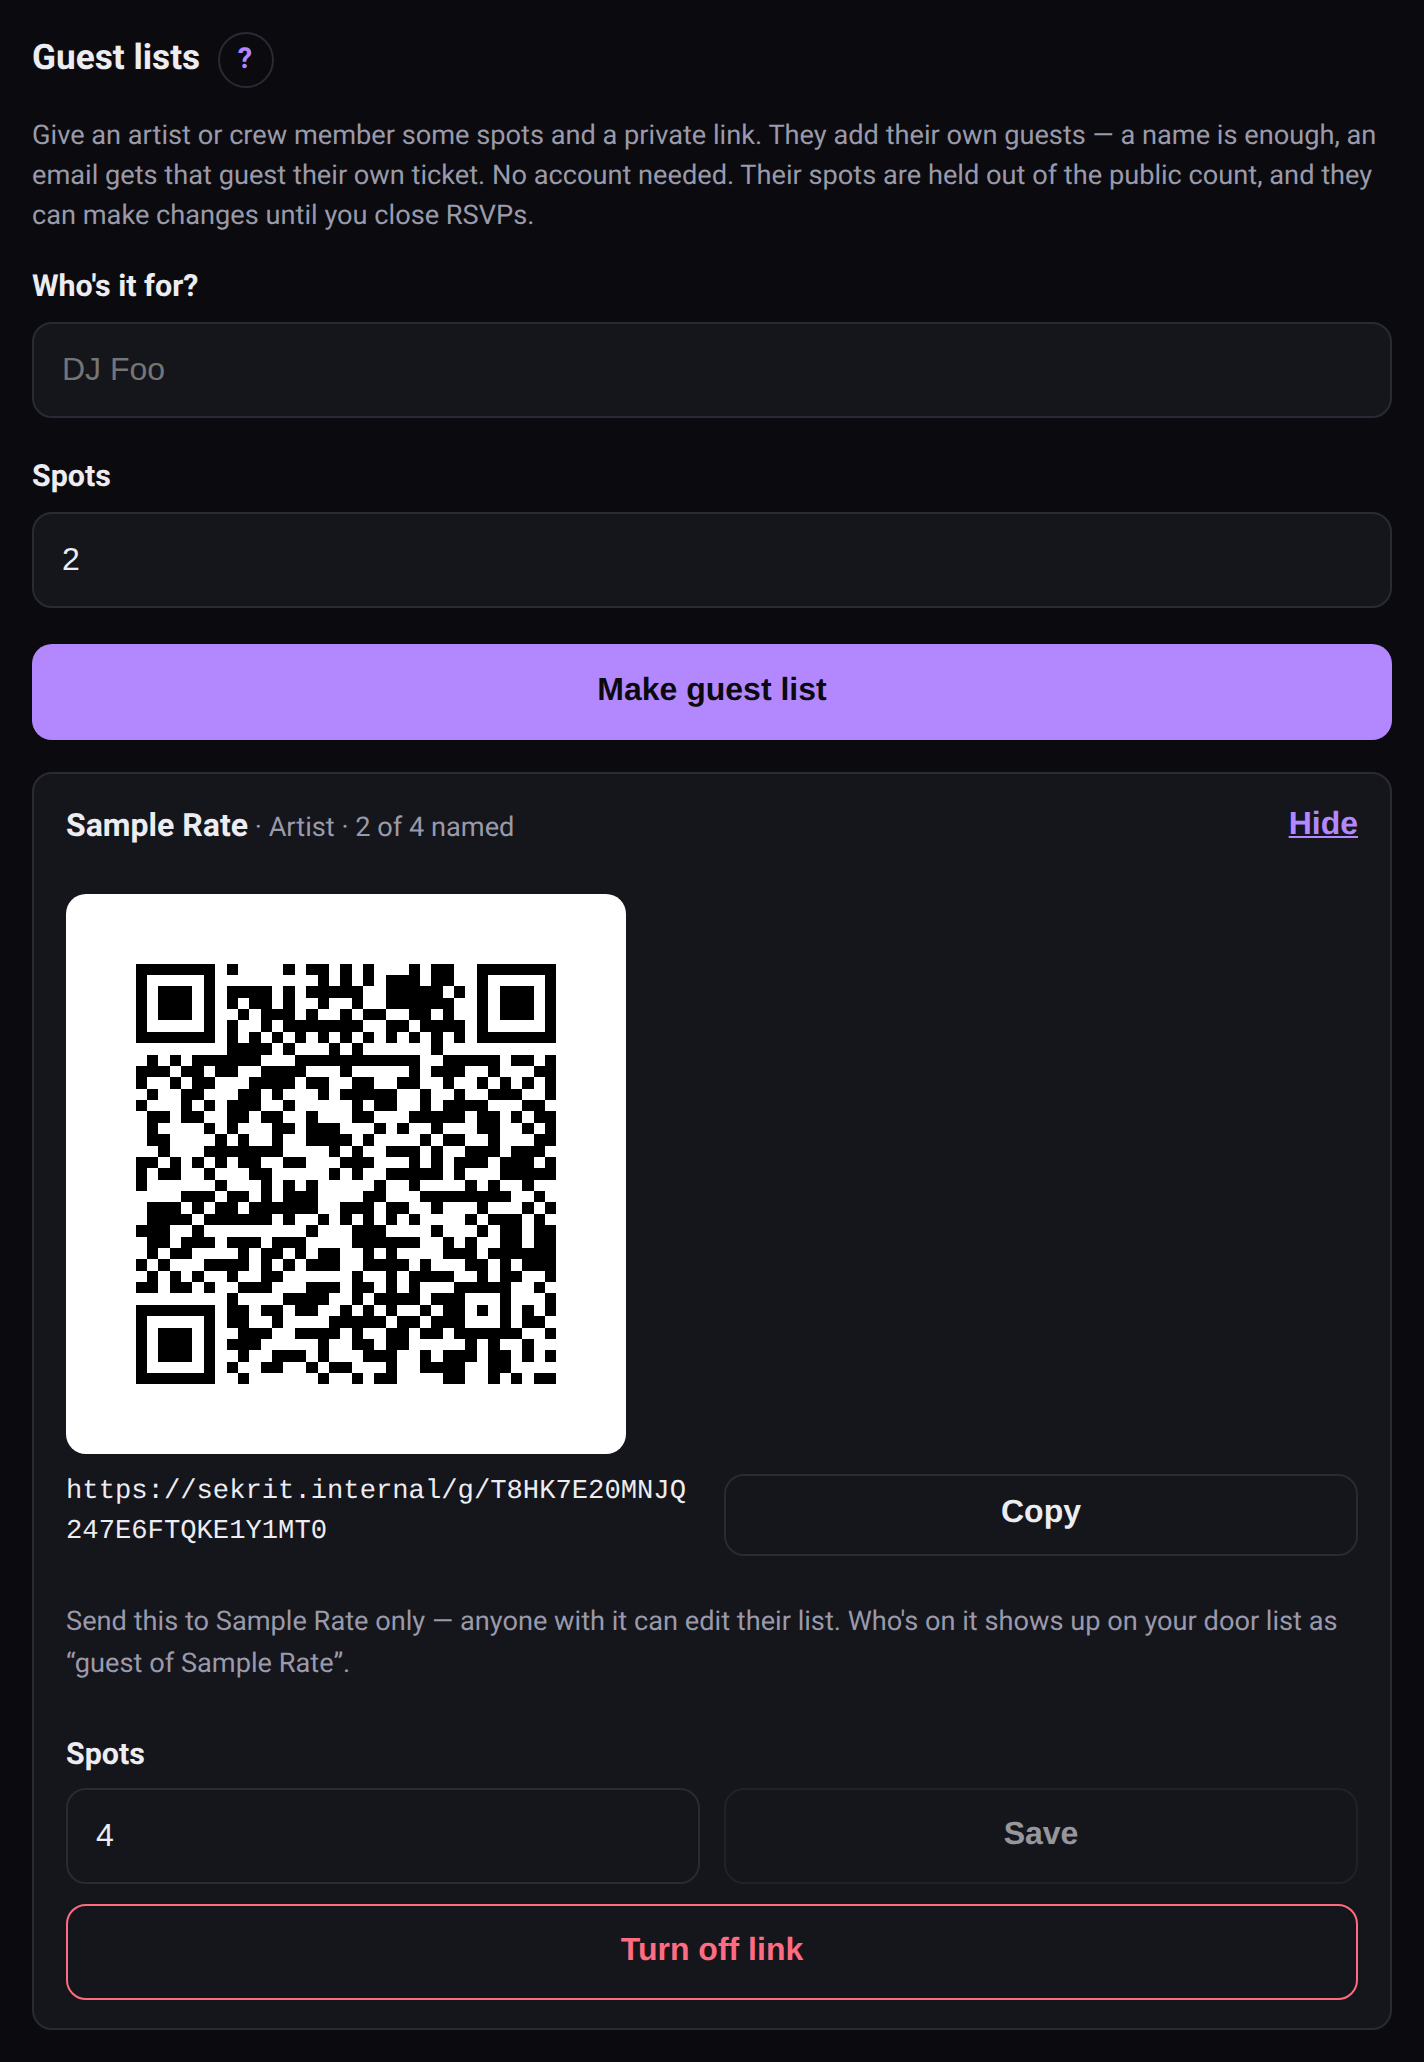 A guest list for an artist, with its private link.
The artist opens the link, no account needed, and adds guests:
- A name puts that guest on the door list.
- A name and an email also gives the guest their own ticket. sekrit doesn't send email yet, so the artist gets the ticket link to forward.
They can fix a name or take someone off until you close RSVPs. Everyone they add shows on your door list as guest of DJ Foo.
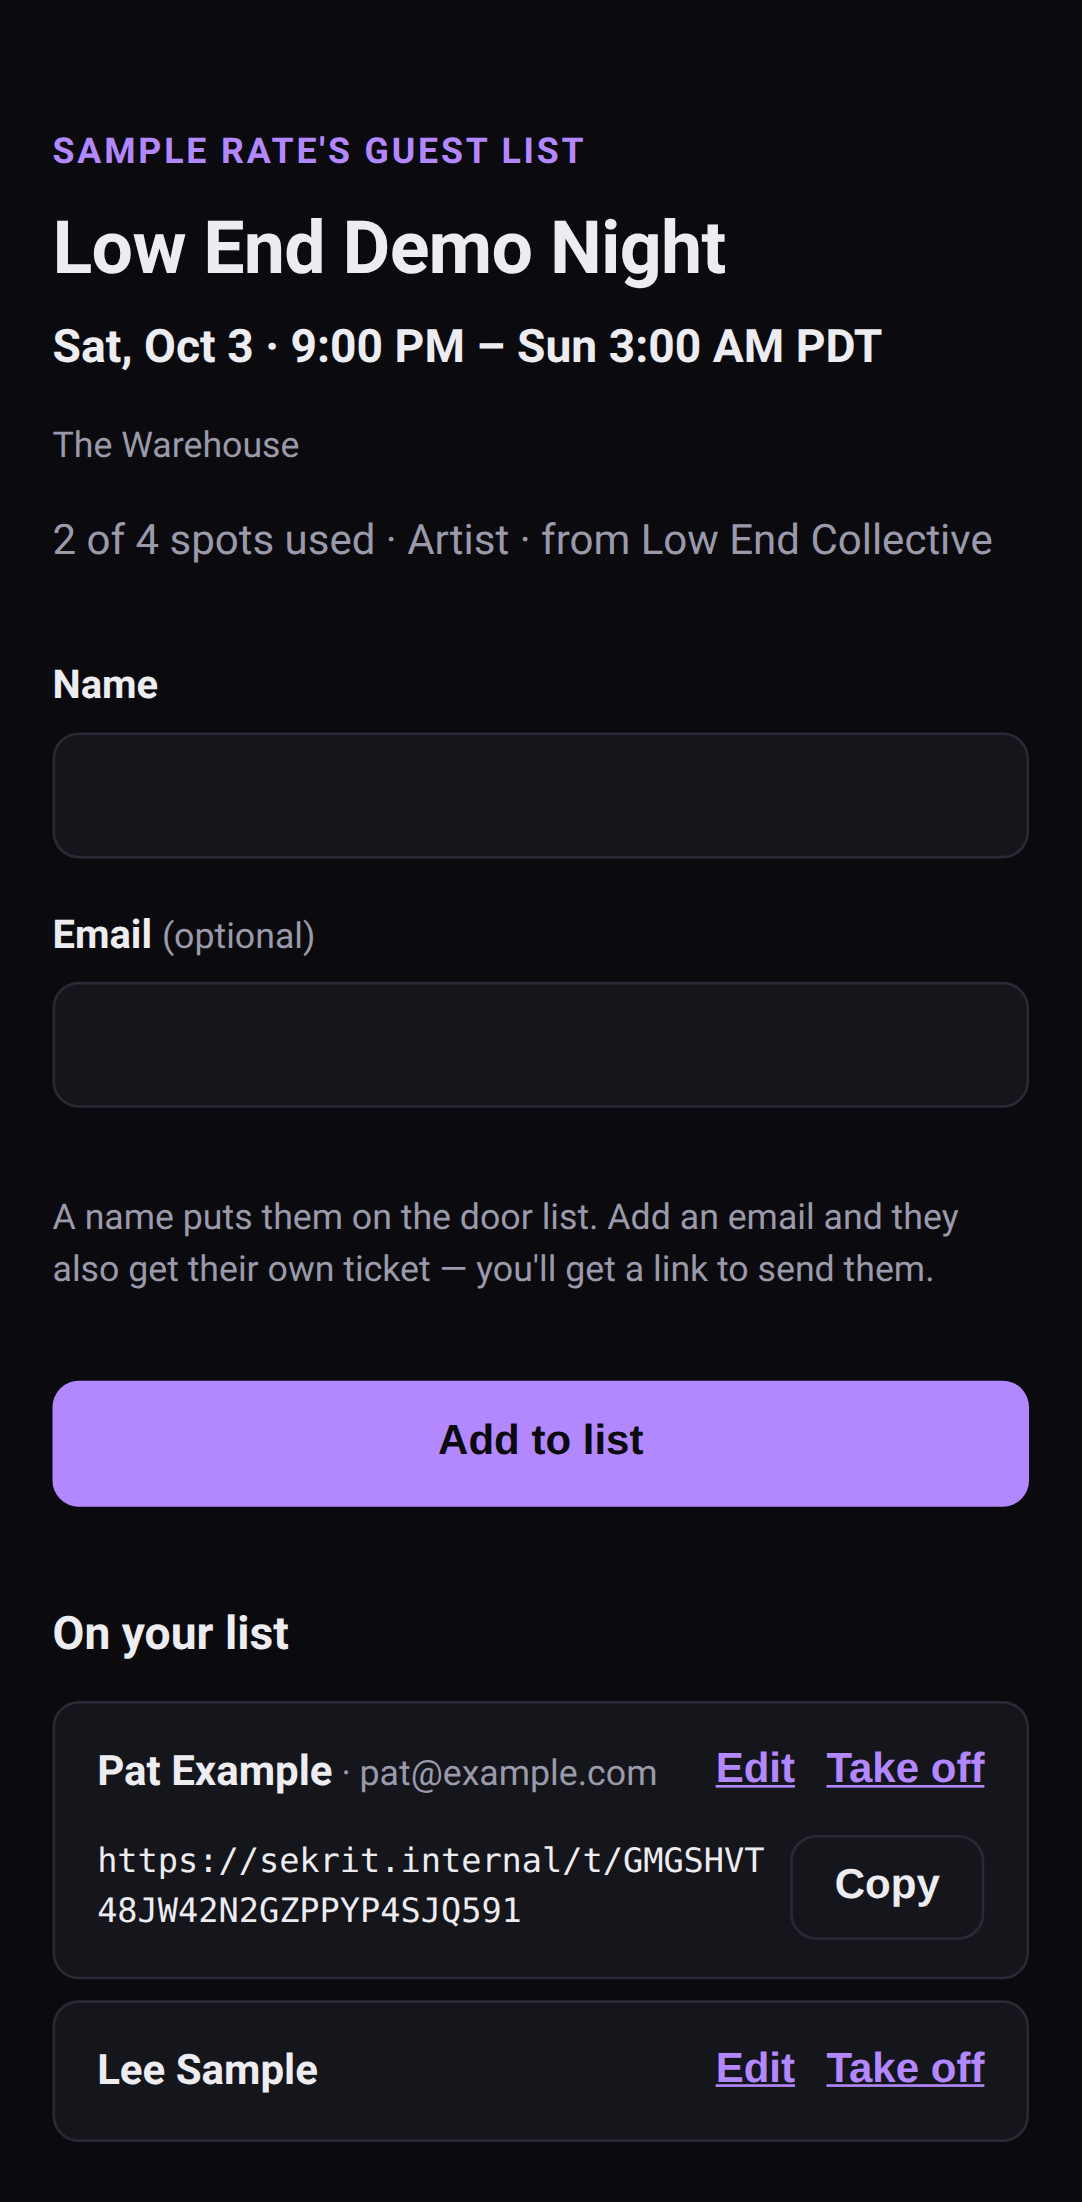 What the artist sees: their own list, and nothing else.
Spots hold their place #
An artist's unfilled spots are set aside: four spots with one name still reserves four places, so the public count never offers a place you've promised to someone. That's also what stops you overbooking.
- More or fewer spots: change the number any time, but not below how many they've already named.
- Turn off link: kills the link and gives unfilled spots back to the public count. Guests already named stay on your door list — turning off a link isn't removing people.
Closing RSVPs #
Close RSVPs on the event page stops new RSVPs — usually at doors, or when you've decided the room's done. It:
- makes the public page say "RSVPs are closed" — never "sold out" unless the room really is full
- locks every artist's list
- doesn't cancel anything: tickets already out still work, and the door runs as normal
Reopen RSVPs undoes it. You can always add guests yourself, closed or not.
3 · Promoters
Money
Your payment links, your accounts. sekrit never touches the money.
sekrit never touches your money. It doesn't take payments, hold them, or pay them out. That's a hard rule, and it's why the setup is this simple.
How payment works #
You add your own payment links — Venmo, Cash App, PayPal, Zelle, a Stripe Payment Link, Ko-fi, or any https link. People pay through them from their order page, after they reserve a priced ticket. When someone pays, the money goes from them to you, through whichever service you picked. sekrit never sees the transaction.
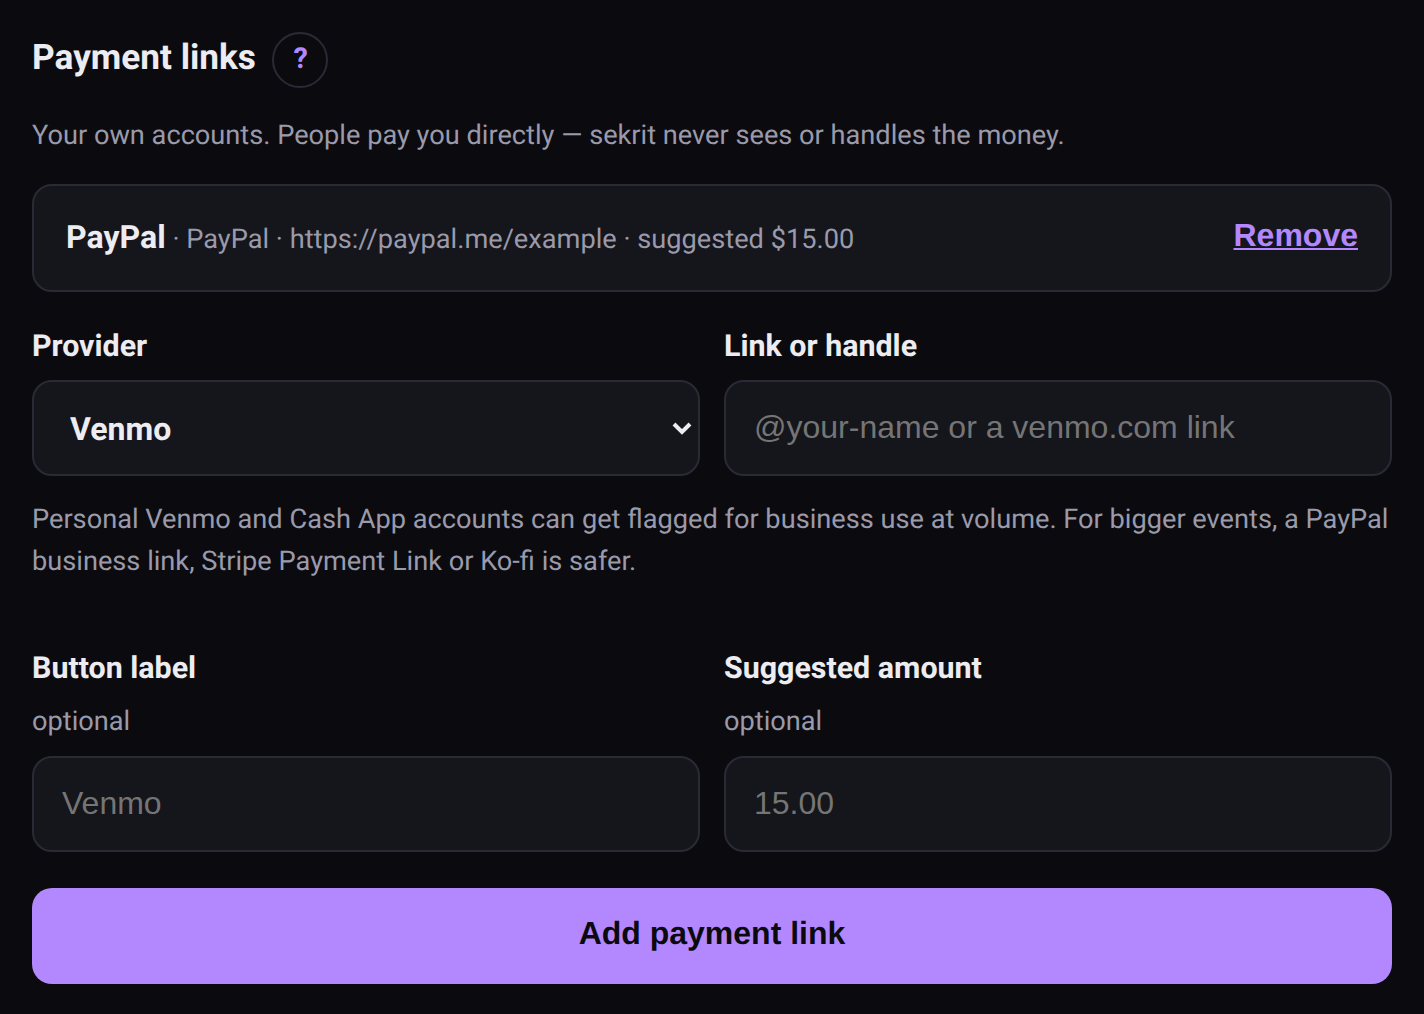 Payment links are your own accounts.
That means:
- No fees from sekrit. Whatever your payment app charges is between you and it.
- No verification by sekrit. It can't see whether someone paid. That's why a priced ticket waits for you: you check your own account and release it (below).
- Refunds are yours to send, from the same app they paid you with.
Personal Venmo and Cash App #
Personal accounts aren't meant for selling things. At volume they can get flagged or frozen. For a big event, a PayPal business link, a Stripe Payment Link or Ko-fi is safer. sekrit mentions this when you add one — it's a nudge, not a rule.
Pay first #
Every ticket with a price is paid first. The ticket waits for the money, and a ticket is never handed out on trust:
- Someone picks that tier and RSVPs. Before they do, the page tells them the ticket is released once you confirm their payment.
- Instead of a ticket they get their order page: the amount, a short reference like #K4T9, and your payment links. On a phone, the Venmo button opens the Venmo app with the amount and reference filled in. Cash App and PayPal.me get the amount; they type the reference into the note.
- They can tap I've paid to let you know. It's a hint, not proof.
- On the event page, Waiting for payment lists each order: reference, amount, name, and whether they say they've paid. Check your own Venmo, Cash App, PayPal or Zelle, and when the money's there, hit Payment received — release.
- The ticket is made then. It appears on their order page (which checks back on its own), and they're on your door list, marked paid.
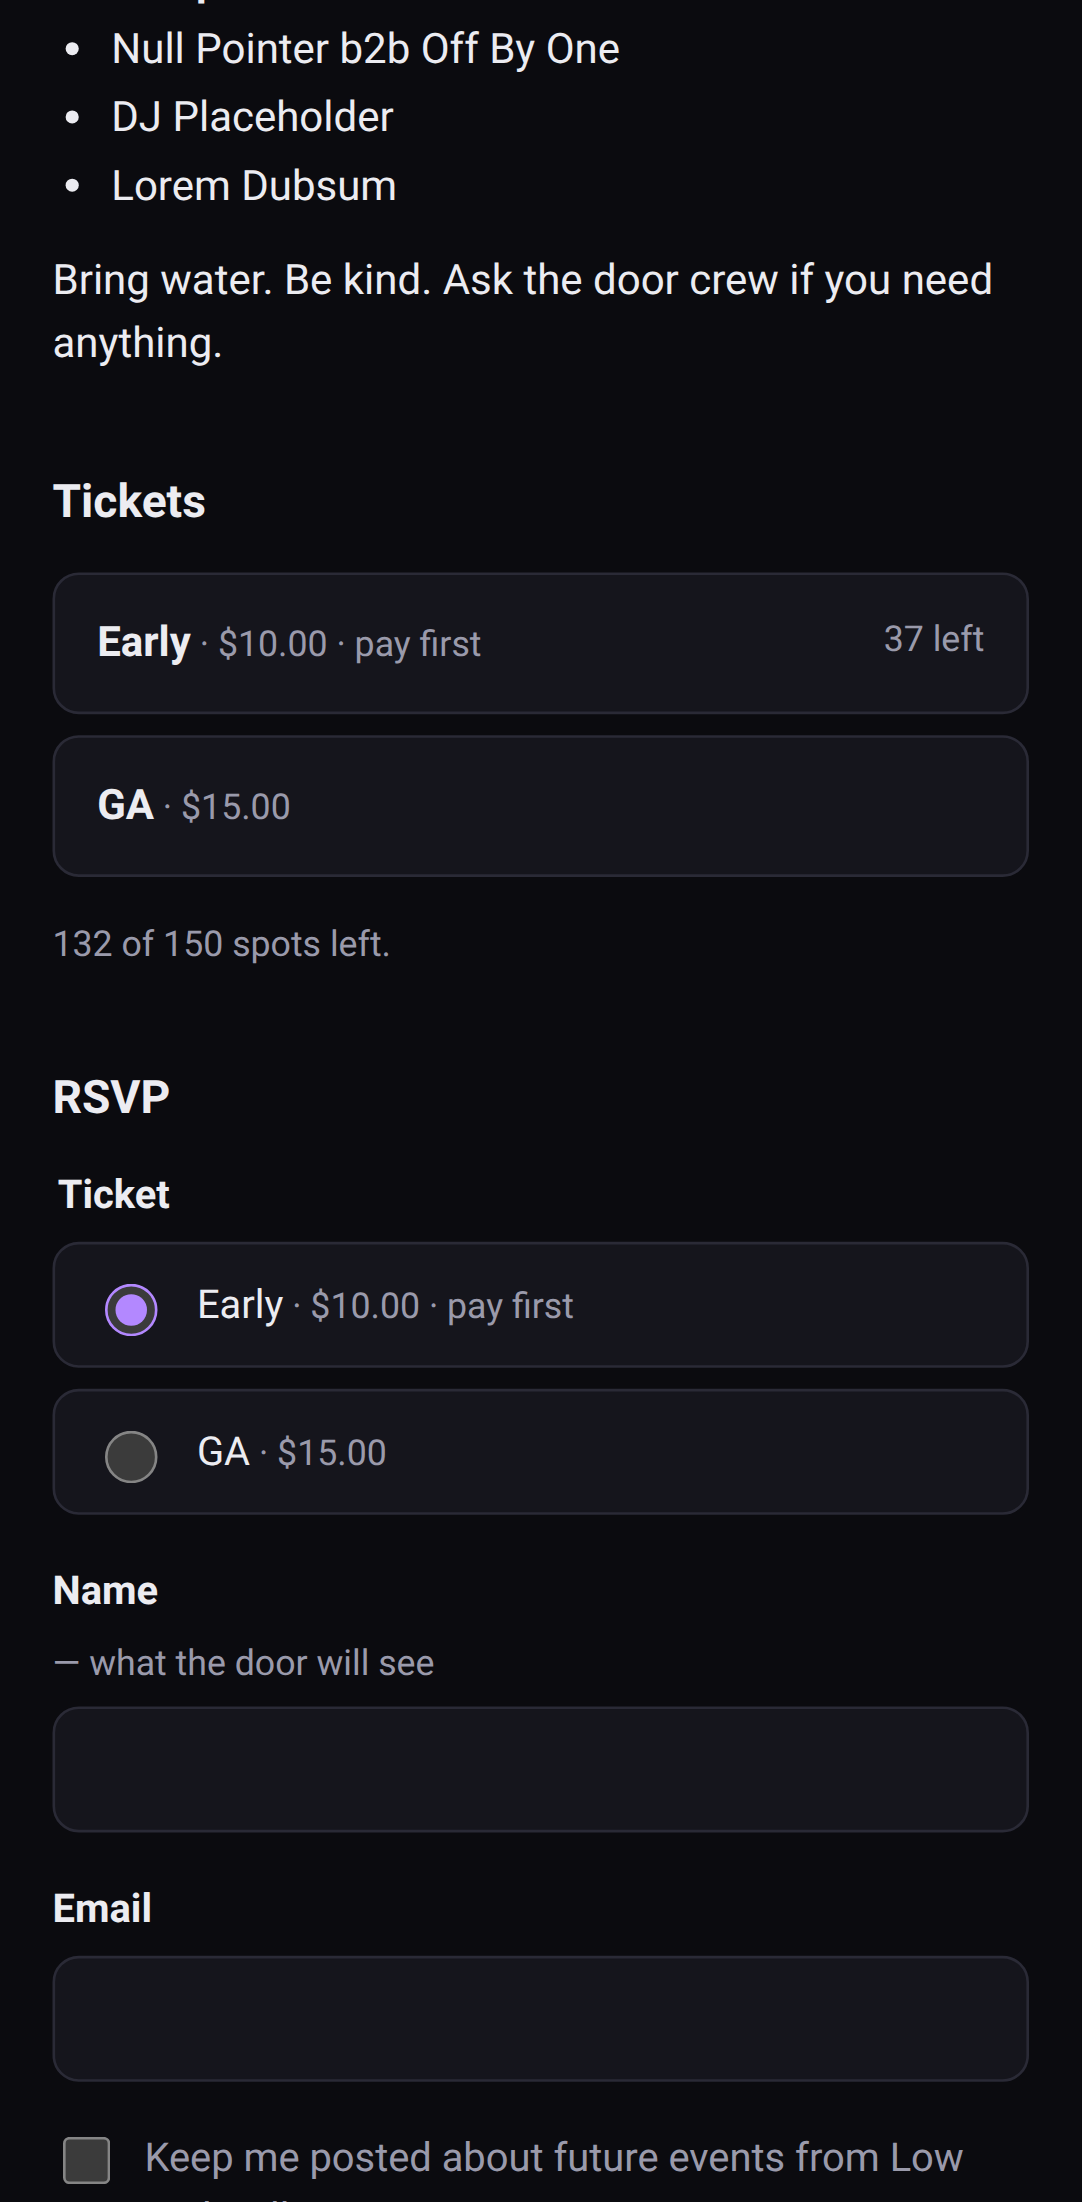 Pay first is said before anyone commits.
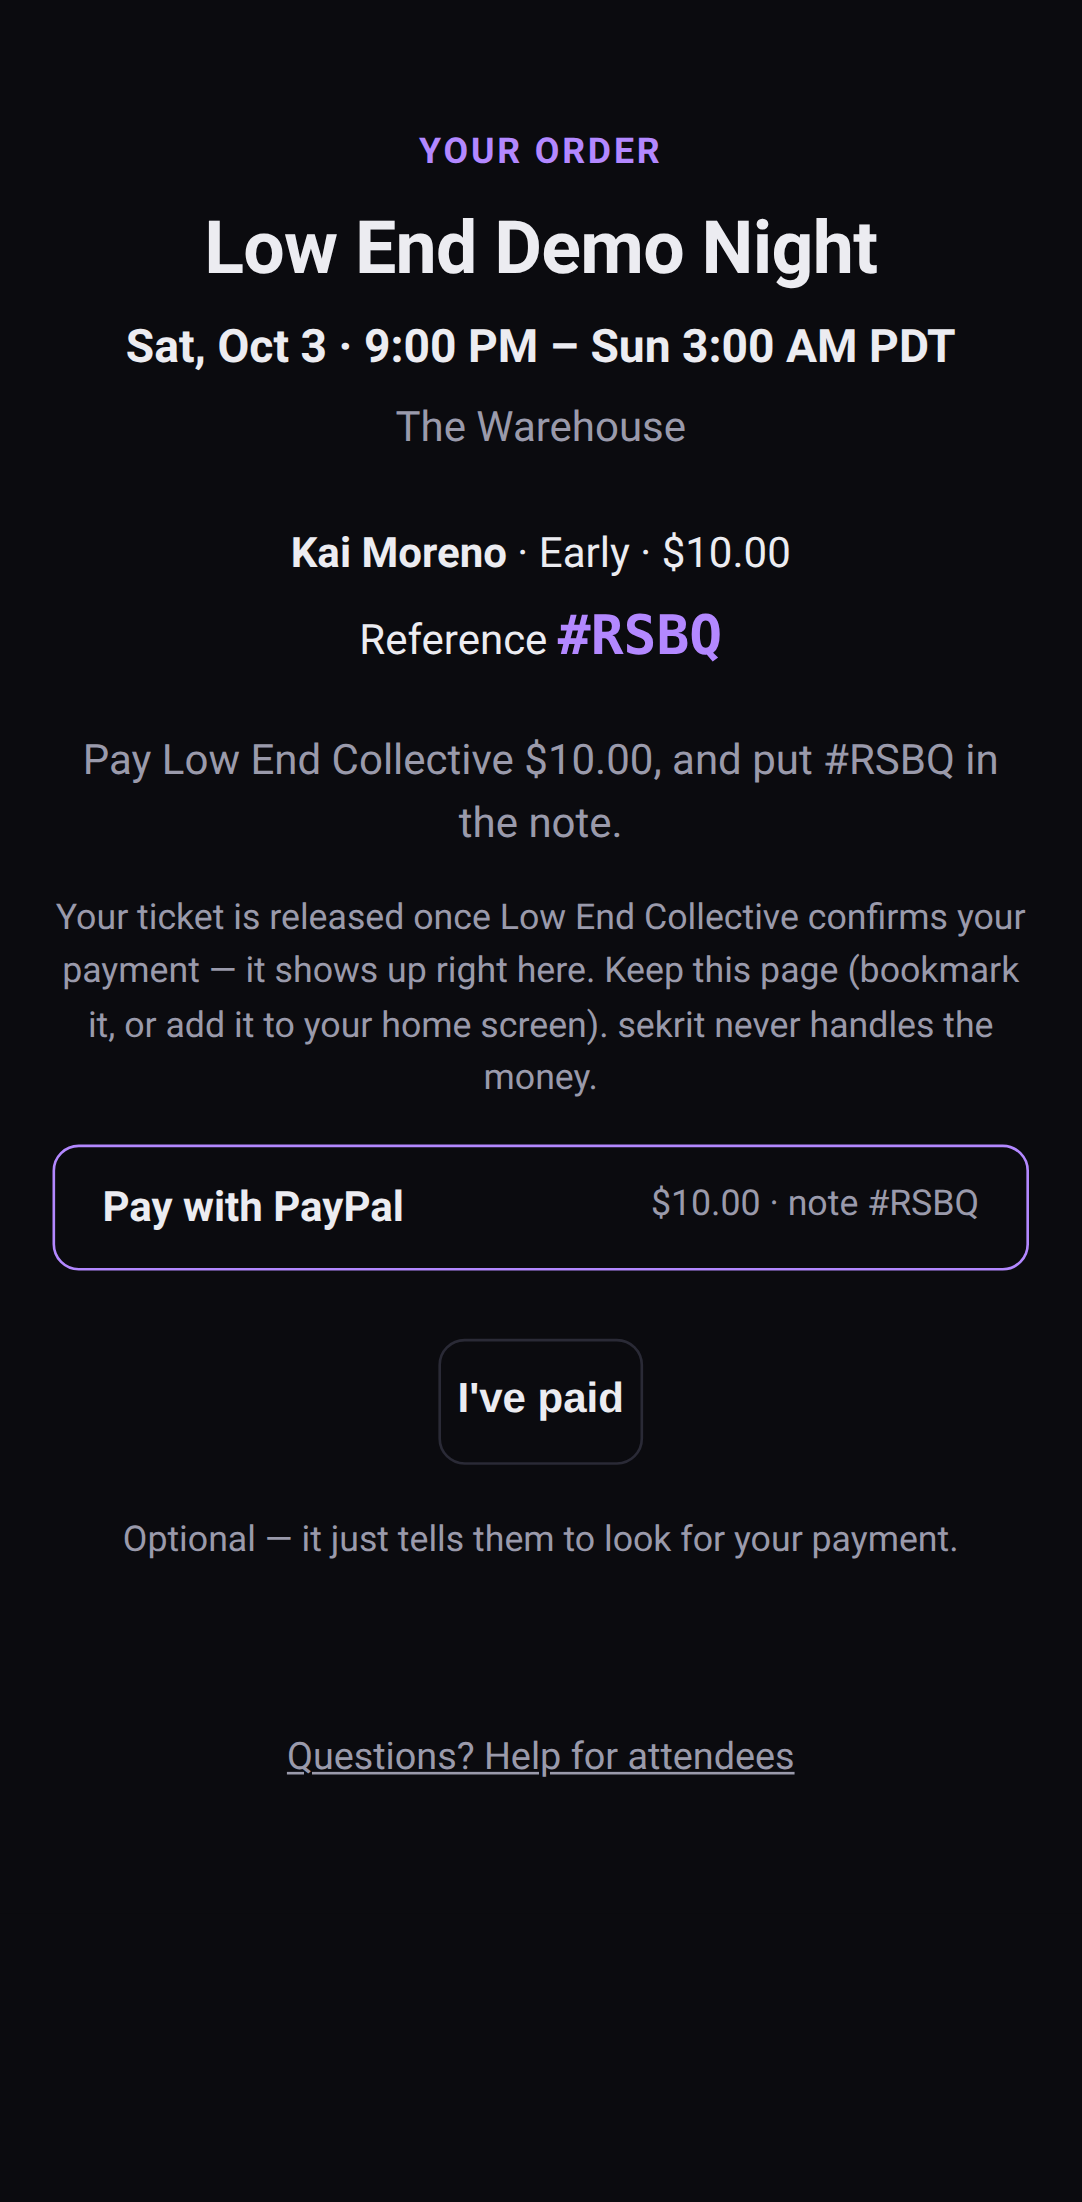 Their order page: what to pay, and the reference to put on it.
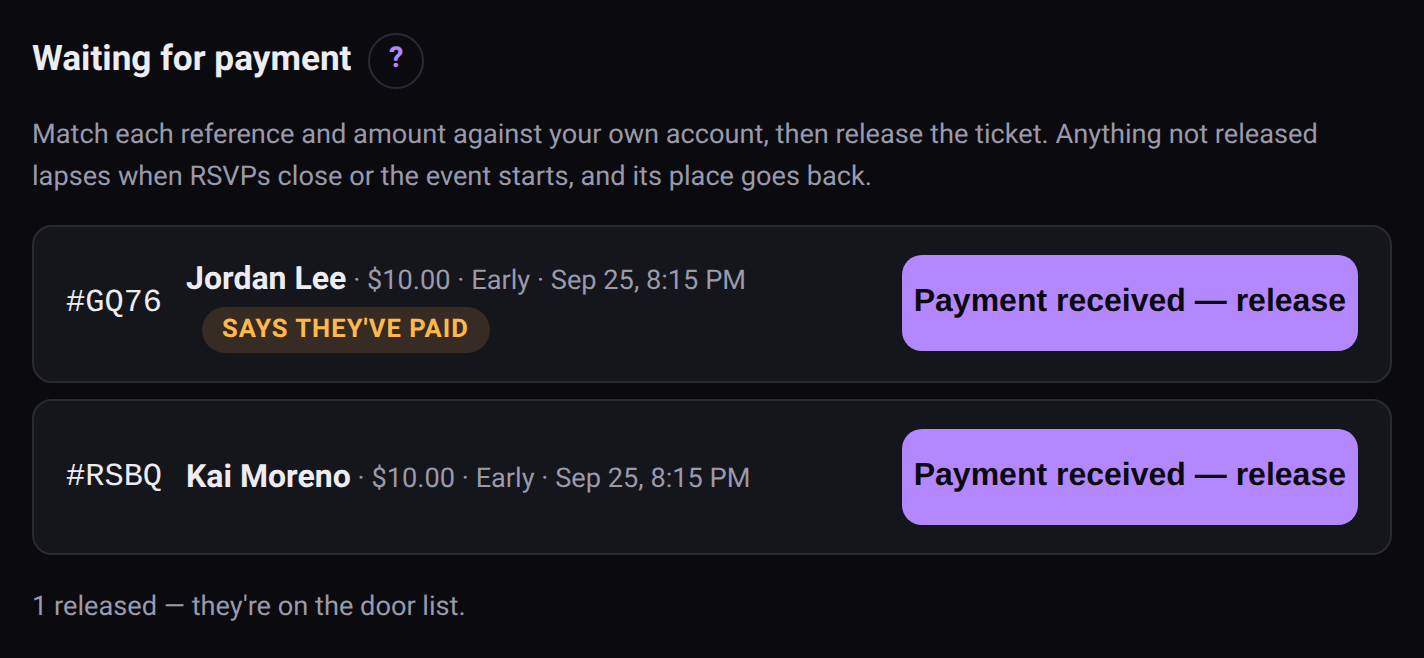 Your side: match it against your account, then release.
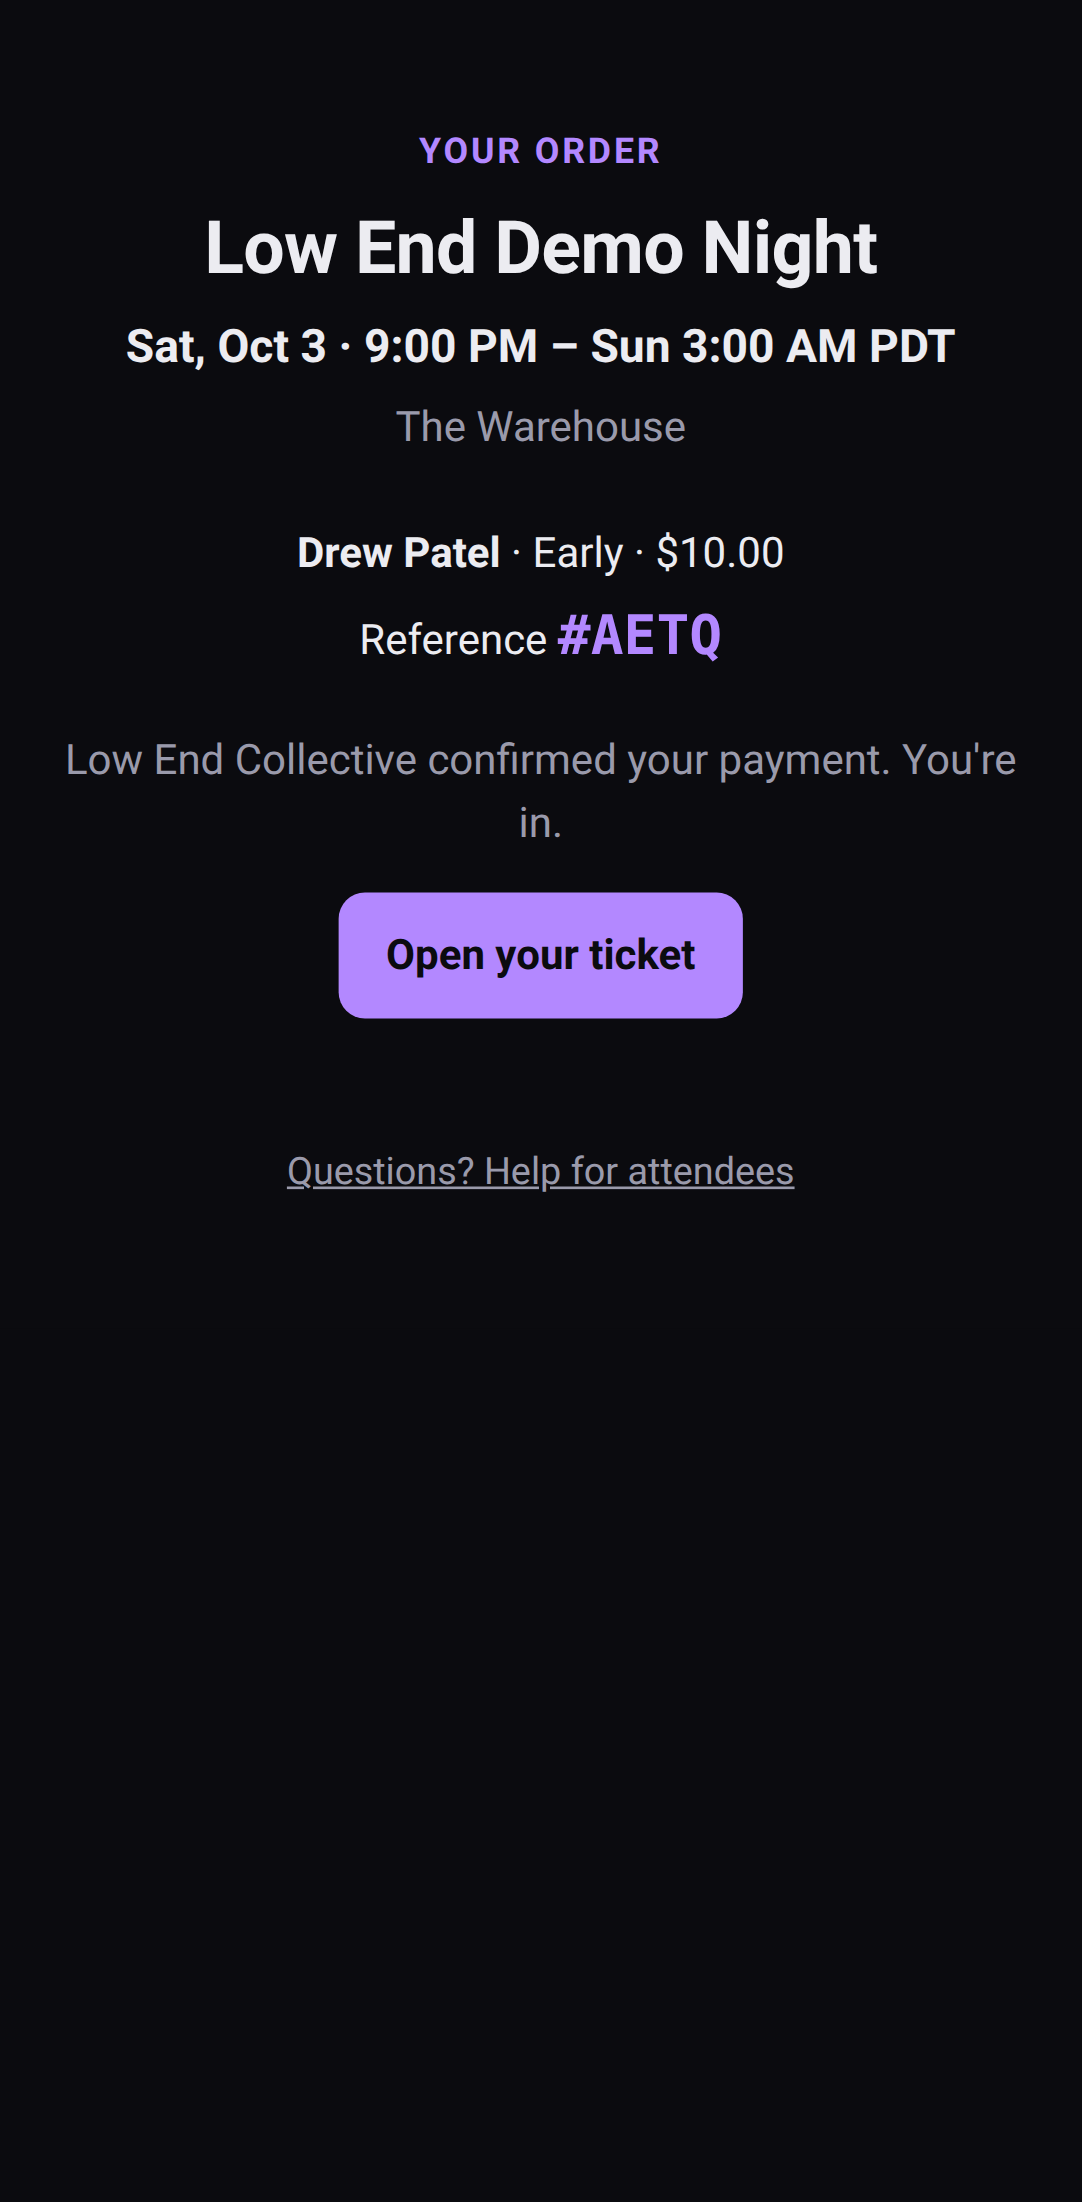 Released: the ticket appears on their order page.
Every order holds its place while it waits, so the public count never oversells.
There's no reject button, on purpose. Releasing is the only thing you can do to a waiting order. Anything not released lapses when you close RSVPs or the event starts, the same for everyone, and the place goes back to the public. Closing RSVPs warns you first if anyone's still waiting.
That's what keeps pay first honest. It confirms a payment; it never picks who gets in. If someone paid and their hold lapsed anyway, add them from the door list and send them the ticket link.
A published event with priced tickets needs at least one payment link, or there'd be nowhere to pay. Free tickets, and guest-list tickets you issue yourself, come straight away.
Keeping track #
On the Door list, the Paid (your note) box is your own record — tick it when you've seen someone's payment land. Nobody else sees it, and sekrit doesn't check it.
When you've sent someone their money back, Mark refunded records it. That's there for people you've cancelled or removed who had paid.
What's coming #
Automatic checkout — Stripe and PayPal taking the payment and issuing the ticket on the spot, with nothing for you to confirm by hand — is on the way. When it lands, the money still settles directly to your own account. sekrit will never hold a balance for you.
4 · Promoters
Flyers, fonts and formatting
Make the event page look like your party.
The event page is the whole pitch. Make it look like your party.
The flyer #
Add a flyer when you create the event, or later under Flyer on the event page.
- JPEG, PNG, WebP or GIF, up to 15 MB.
- sekrit keeps a copy up to 2048px on the long edge — sharp on any phone, light enough for a basement's one bar of signal.
- A preview image is made for link previews, so the flyer shows when the link is pasted into a chat or a story.
Replacing the flyer gives it a new address, so chat apps that cached the old preview pick up the new one.
A flyer, a title font and an accent colour.
Title font and accent colour #
Pick a title font and an accent colour when you create the event or under Details. The accent colours all pass contrast checks against the dark background, so text stays readable under venue lights.
The description #
The description takes simple formatting — the Formatting help link under the box shows the lot:
| Type this | Get this |
|---|---|
**bold** | bold |
*italic* | italic |
## Lineup | a section heading |
- DJ Foo | a bullet list |
[tickets](https://…) | a link |
Each line break stays a line break, so a lineup typed one artist per line reads that way. Preview shows exactly what people will see.
What it won't do: HTML, and images. Images go in the flyer.
5 · Promoters
Your list
Who came, who wants to hear about the next one, and how to take it with you.
Your list is yours. Everyone who RSVPs or signs up lands on it, and you can download it any time and take it anywhere.
Who's on it, and who's subscribed #
Your list in the top bar shows everyone: people who RSVP'd, guests with an email, and people who signed up at the merch table or on your site.
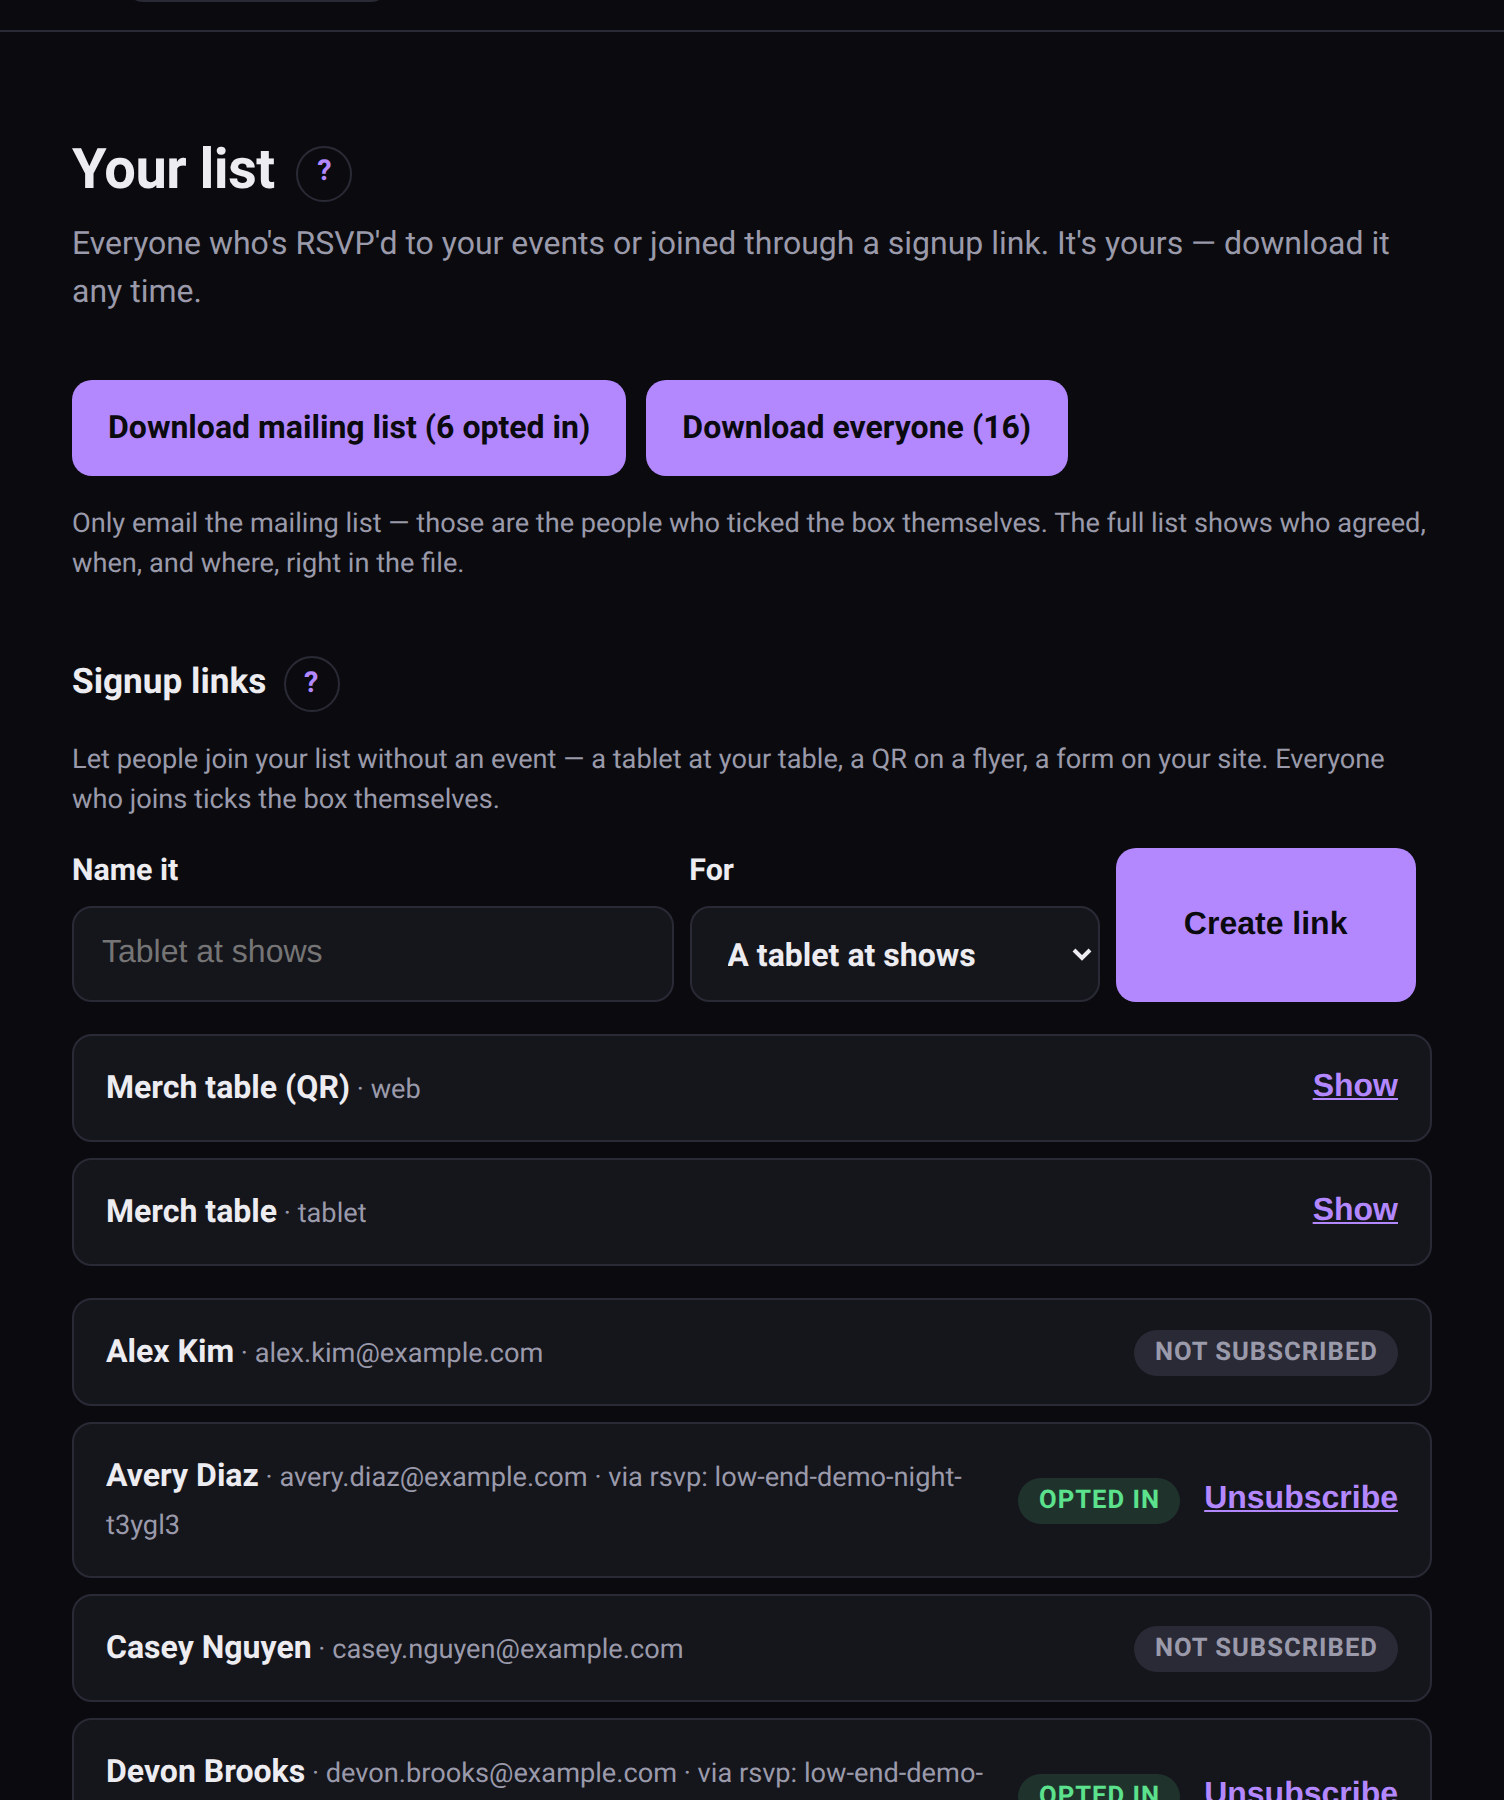 Your list: who came, and who asked to hear from you.
Being on the list isn't the same as being subscribed. Only people who said yes are subscribed:
- an RSVP with the "keep me posted" box ticked — it starts unticked
- a signup form, where agreeing is the point
Nobody is subscribed by default, and you can't subscribe anyone — only they can. Each subscribed contact shows where they agreed ("rsvp: bass-night", "signup: Tablet at shows"). If someone ever asks why they're on your list, that's the answer.
Unsubscribing #
Unsubscribe next to anyone takes them off your mailing list. They stay on the list of people who came.
Downloading #
- Download mailing list — only people who opted in. This is the one to import into your mail tool.
- Download everyone — the whole list, subscribed or not.
Both are CSV and open in any spreadsheet.
Signup links #
Signup links get people on your list without an event: a link for your site, a QR for a flyer, or a tablet at the merch table. See The merch-table tablet.
Blocked emails #
The Blocked section at the bottom is for keeping someone out of your future events. See Keeping the space safe.
6 · Promoters
Keeping the space safe
Remove someone, block them from future events, and record refunds.
Crews need to be able to make a space safe. sekrit gives the promoter and the door two tools: remove someone from an event, and block an email from your future events.
Remove someone #
From the door list: Remove… next to anyone — including people already inside. Add a reason if you want, and tick Also block their email to keep them out of your future events too.
At the door: after a scan, door crew see Remove from event… under the result. The record says which door code did it, so you know which shift made the call.
When someone is removed:
- their ticket reads REMOVED — DO NOT ADMIT at every door, online or offline
- their place goes back to the capacity count
- their ticket page just says it's no longer valid
A removal made on a phone with no signal takes effect on that phone straight away, and reaches everyone else once it's back online.
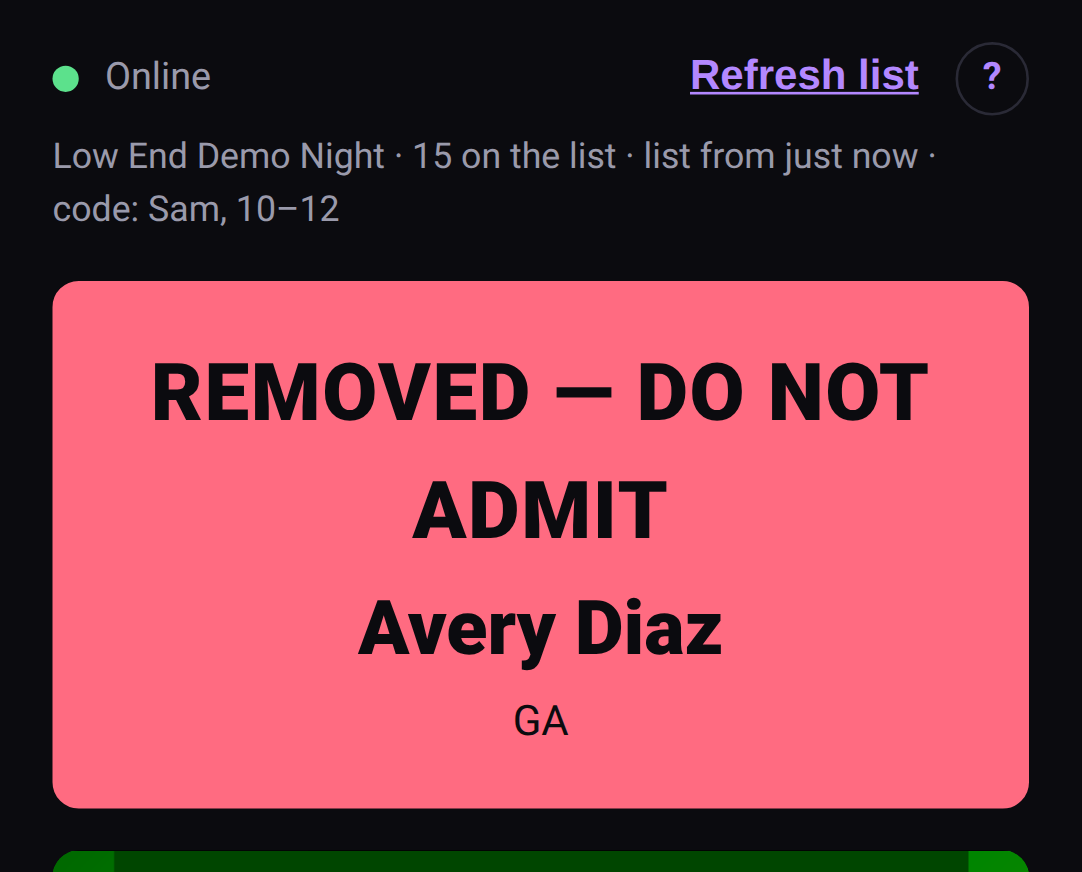 What every door shows for someone who's been removed.
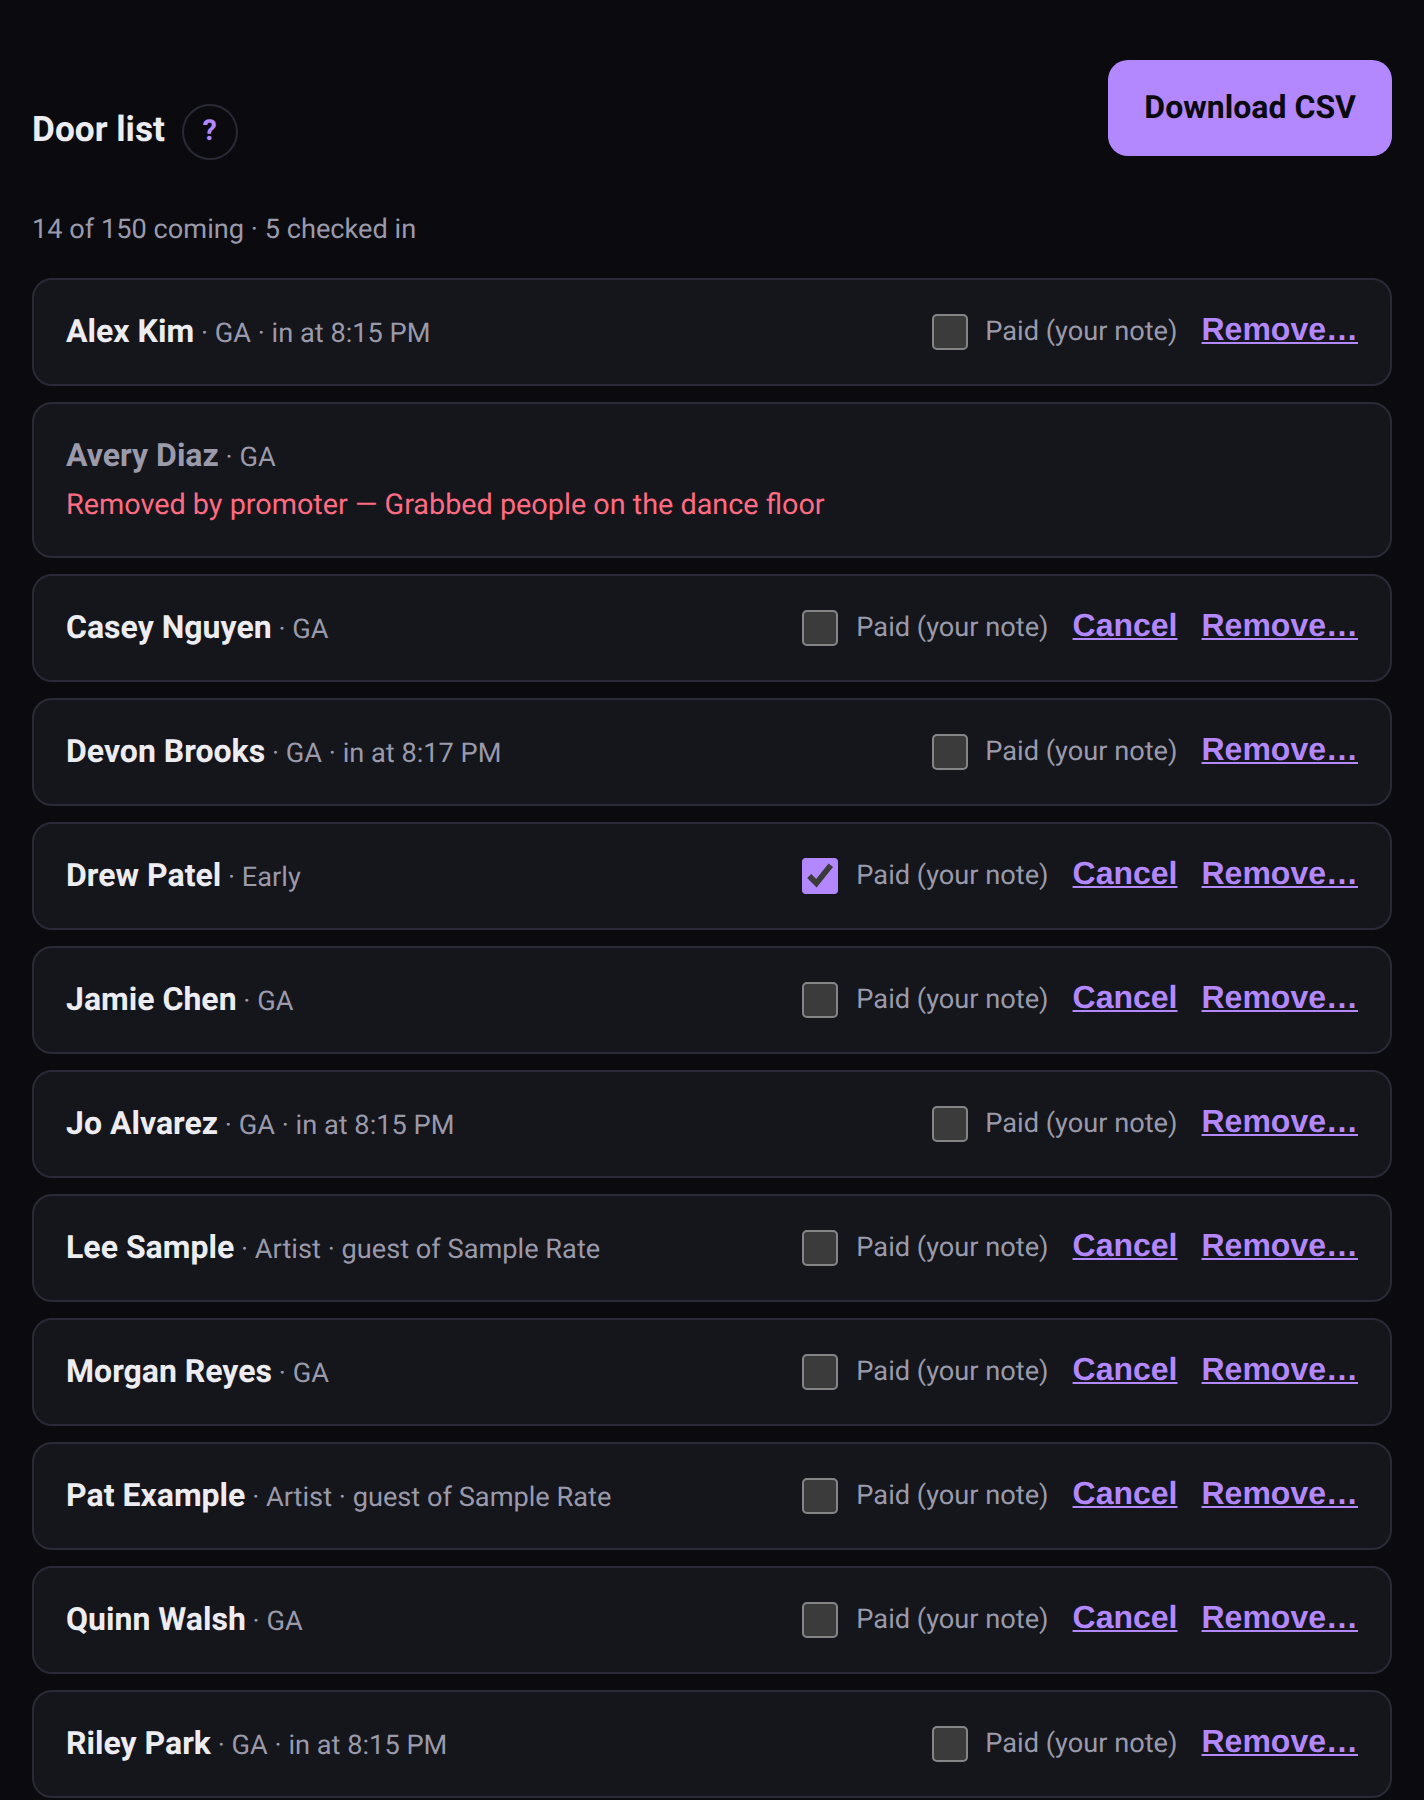 On your door list, the reason stays with you and your crew.
Block an email #
The Blocked section at the bottom of Your list is your private block list. Add someone by hand — an email, a note to recognise them by, a reason — or tick the box while removing them.
A blocked email can't RSVP to your events, and an artist can't add it to their guest list. They're told they can't RSVP and to contact you. No reason, and nothing that says a block list exists.
It's honest about its limits: a new email address gets around it. It stops a known problem walking straight back in. It isn't a wall.
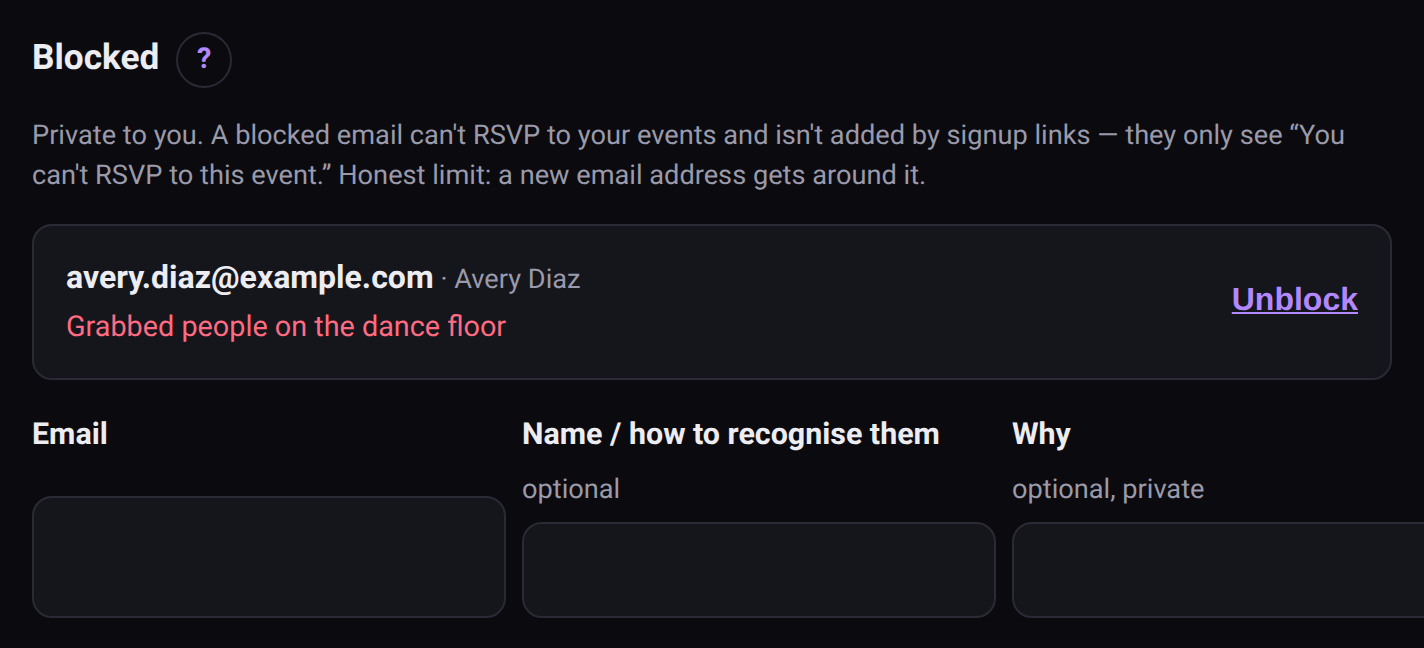 Your block list is private, and covers your events only.
What stays private #
The reason is yours. You and your door crew see it. The person never does, and neither does anyone else.
Blocks are yours. Your list covers your events only. It's never shared with other promoters, and there's no platform-wide list.
Why this isn't gatekeeping #
sekrit doesn't do invite codes, approval queues or "you need to know someone". Removing a person is different in kind: everyone starts welcome, and one named person is taken out for something they did. It's one person at a time — never a pattern, a domain or a score.
Refunds #
If they'd paid you, send the money back yourself from the app they paid with, then hit Mark refunded on the door list to record it. See Money.
7 · Promoters
Your account
Where you're signed in, what's been done with your account, and your password.
Your account page is Account in the top bar. It shows where you're signed in and what's been done with your account, and it's where you change your password.
Where you're signed in #
Every phone, laptop and browser you've logged in on is listed. Each one shows the kind of device, when it signed in, and when it was last used. The one you're looking at is marked this device.
A device stays signed in for up to 30 days. If it goes a week without being used, it's signed out sooner. Either way you log in again on that device, and nothing else changes.
Sign out a lost phone #
Logged in on a phone that went missing at the venue, or on a friend's laptop? Press Sign out next to it. It's signed out straight away, even if someone has the phone in their hand.
Sign out everywhere else does that for every device except the one you're using.
Log out in the top bar ends the session on the server, not just in this browser. A copy of your login taken from that browser stops working too.
Change your password #
Type your current password and a new one of at least 12 characters. You need the current one, so someone who finds your laptop still logged in can't lock you out of your own account.
Changing your password signs out every other device. The one you're on stays signed in.
Recent activity #
A record of what's been done with your account over the last year:
- logins, and wrong passwords typed for it
- downloads of your list and of a door list, with how many rows
- door codes and signup links made or turned off
- people removed, emails blocked or unblocked, and people taken off the mailing list
Each line says when, and which device and IP address it came from. Only you see it.
It never keeps a copy of anyone's details. It says you downloaded a door list of 40 people, not who they were. It doesn't record a removal reason either. That stays on the ticket, where your crew can see it.
A wrong password you didn't type means someone tried to get in. It doesn't mean they did. If you also see a login you don't recognise, follow the steps below.
If you think someone else got in #
- Change your password.
- Look at Where you're signed in. Anything you don't recognise is signed out once the password changes.
- Look through Recent activity for downloads or changes you didn't make.
- Check your events and their door codes. Turn off any door code you didn't make. See Door codes.
8 · The door
Crew and shifts
Post the jobs, hand out the crew link, and see who's working when.
Post the jobs at your show, hand out one private link, and let your crew pick their own shifts. Everyone who works a shift gets in on a crew ticket, and everyone can see who's doing what.
Roles #
Under Crew on the event page, add the jobs your show needs. One click adds the usual ones: Site director, Gate, Door, Bar, Merch, Setup and Cleanup. Or add your own, with a line saying what the job is.
Tick Gets a door code for a role that scans tickets. Whoever takes one of its shifts gets their own door code, on their own page, labelled with their name.
Shifts #
Add a shift for a role: the date, from, to, and how many people it needs. Times are at the venue, and a shift can run past midnight: 11pm to 1am is one shift. Notes go to whoever takes it ("wristbands are in the blue box").
The crew link #
Make a crew link and share it with your crew. Put it in the group chat, or print the QR. The link is the password: anyone who has it can see the schedule and sign up, and nobody else can.
- First come, first served. Helpers pick open shifts. When a shift's full, it's full. Two people can't both get the last spot.
- New link makes a fresh one if the old one got out. The old link stops working straight away.
- Turn off stops new signups. Crew who already have shifts keep them.
The crew page is also the who's-who: every shift with who's on it. It shows names only. Emails and phone numbers are just for you.
What a helper gets #
Signing up gives them their own page. Tell them to bookmark it. It has:
- their shifts, with what the job is and your notes
- a crew ticket with a QR code, which gets them in like any ticket. It's one ticket however many shifts they work.
- their door code, if they're working a door shift. The scanner shows their name on it.
- taking another shift, or dropping one. They can drop up to the start of the event. After that, they need to tell you.
Dropping their last shift cancels their crew ticket and gives the place back.
Your side #
Who's signed up lists everyone, with their email, phone and shifts. Download the crew list gives you the lot as a spreadsheet.
Take off crew removes someone: their shifts open up, their door code stops working, and their crew ticket goes, unless they're already inside.
The fine print #
- Crew tickets count against capacity, like any ticket, so your public count stays honest. Crew are never turned away for a full room, though. You planned them in.
- Crew signup never touches your public RSVP. Anyone with the event link can still RSVP.
- sekrit never pays anyone. Wages, tips and bar cuts are between you and your crew.
- Crew go on your list as crew. They only get your emails if they tick the box.
9 · The door
Run the door
Door codes, crew phones, scanning, and what to do with no signal.
Any phone can be the scanner. Crew use their own — no app, no accounts, and it keeps working when the basement has no signal.
Door codes #
On the event page, under Door, make a code for each person or shift: "Sam, 10–12", "Jo, 12–2". Each one comes with a link and a QR. Point a crew phone's camera at the QR and it opens the scanner, ready to go.
- One code per person or shift, so you can turn one off on its own when a shift ends or a phone goes missing.
- Turn off kills a code straight away. Any phone using it stops scanning.
- The scanner shows the code's label, so a phone handed over at a shift change says whose code it's still on.
- A door code opens this event's door and nothing else. It isn't a login.
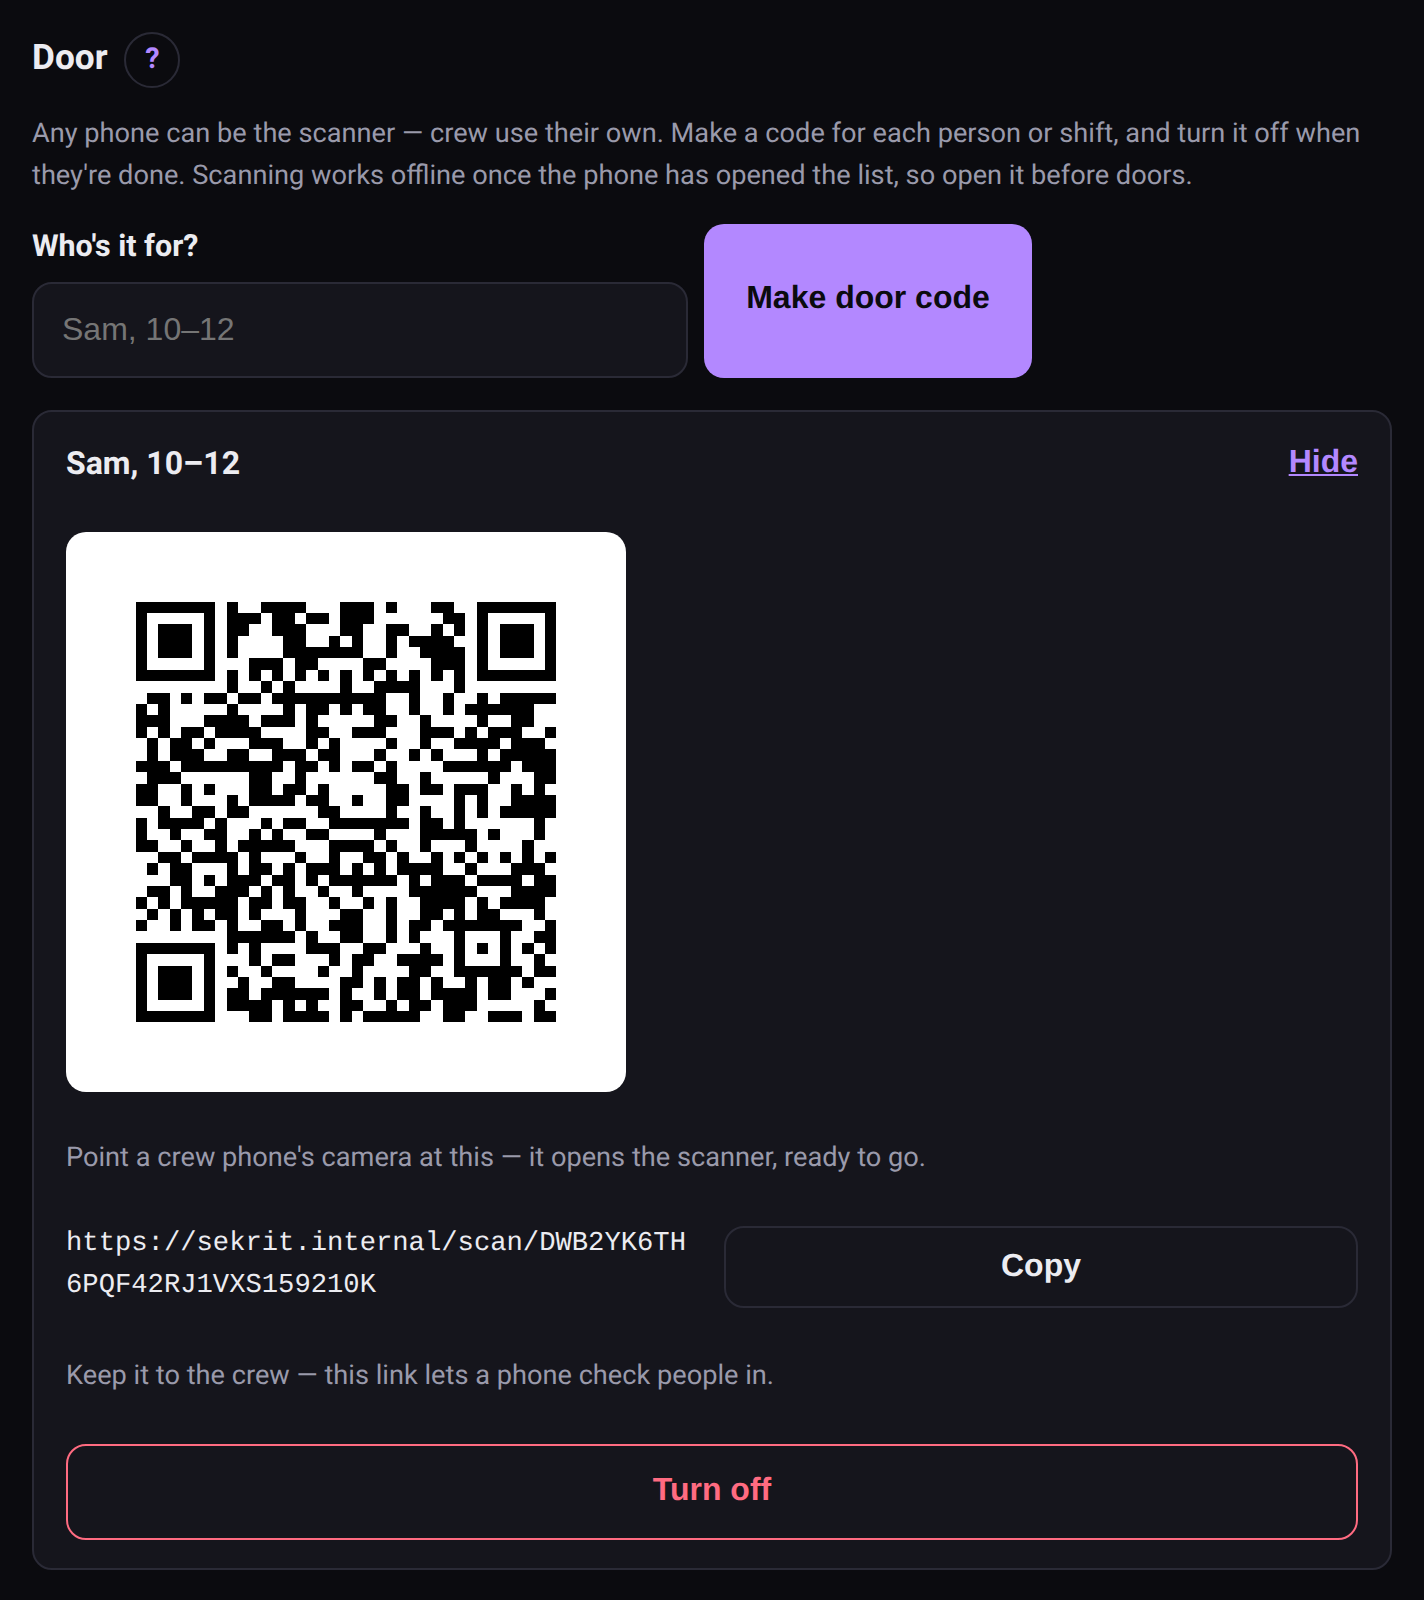 A door code for each person or shift. Point a crew phone at the QR.
Before doors #
Do this with signal, ideally the day before. From a week out, the event page shows this as a checklist you can tick off.
- Open the scanner on every door phone. It downloads the guest list and saves itself for offline use. One visit is enough.
- iPhone: add it to the home screen (Share → Add to Home Screen). Safari clears a site's saved data after about a week unless it's on the home screen — including the guest list and any unsent scans. The scanner reminds you.
- Do a test scan with your own ticket.
- Charge everything. The scanner keeps the screen awake while it's open, which is great at the door and hard on a battery.
Want to try a phone's camera before the night? The scanner test page checks it without touching a real event.
Scanning #
Point the camera at the ticket's QR. The result fills the screen:
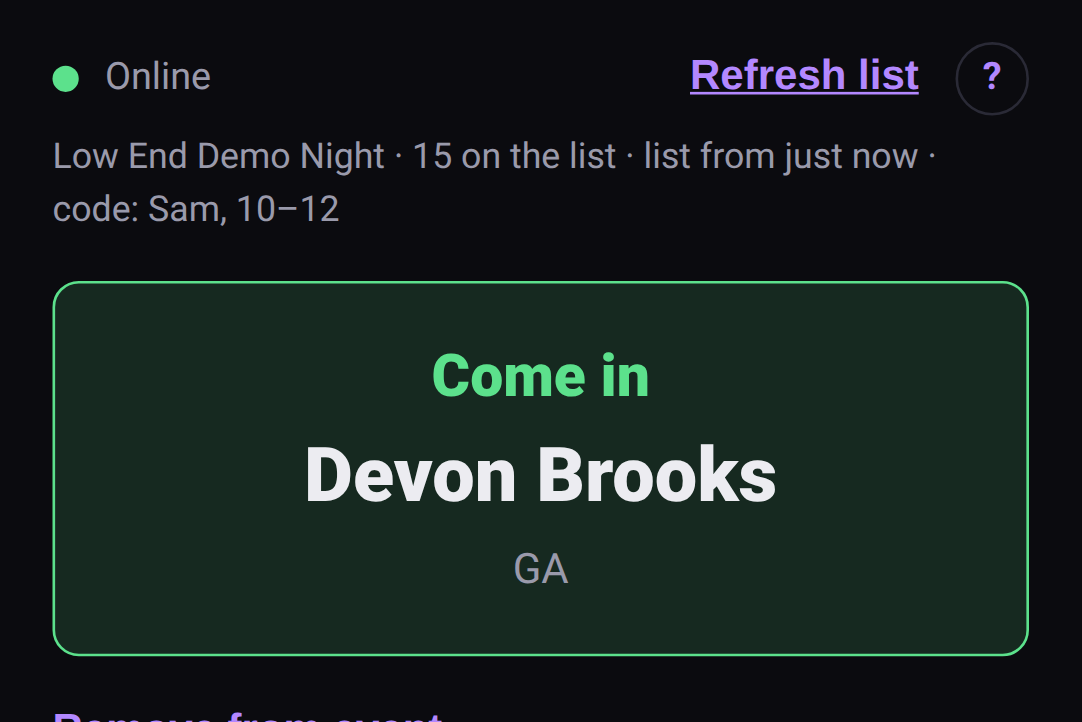 Come in.
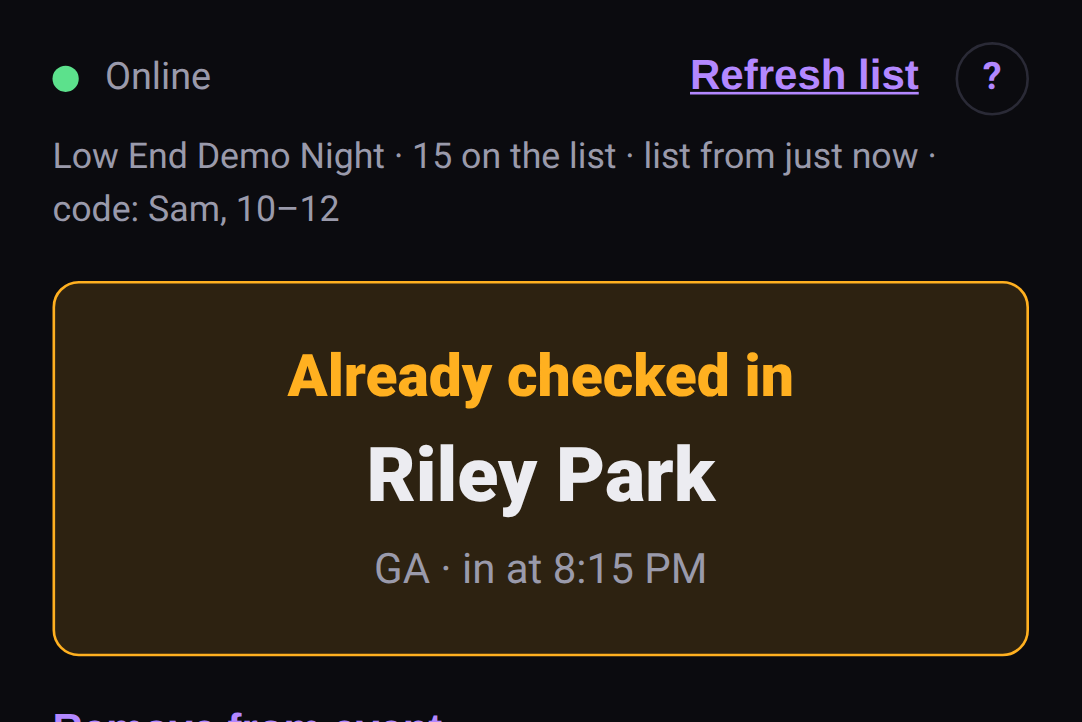 Already checked in — with the time.
| Result | What it means | What to do |
|---|---|---|
| Come in | Valid ticket, first scan | Let them in |
| Already checked in · in at 10:42 | This ticket was scanned before | Check the name. Could be a re-entry, could be a shared screenshot |
| Not on the list | No ticket matches | Check the code, try typing it. Still nothing? Find the promoter |
| Ticket cancelled | The promoter cancelled this ticket | Not valid tonight |
| Event cancelled | The whole event is off | Nobody's getting in on this event |
| REMOVED — DO NOT ADMIT | Someone was removed for safety | Don't let them in. Get the promoter if there's trouble |
Typing the code #
Every ticket has a typed code under its QR, like K4T9-2M7X-…. When the camera won't read a cracked screen in the dark, type it into Type the code instead. Dashes, spaces and lowercase don't matter, and the letters people usually mistype (O for 0, I or L for 1) are read the way they meant.
A USB or Bluetooth barcode scanner #
A handheld scanner acts like a keyboard: it types the code and presses Enter. Tick USB barcode scanner attached and the code box stays ready for the next scan without the on-screen keyboard popping up.
No signal #
The scanner works offline once it's opened the list:
- The top bar says Offline — scans are queued (or Can't reach sekrit), with how many are waiting.
- Scans are checked against the list on the phone, and each one is sent when the signal comes back. Nothing's lost if the phone locks or the page reloads.
- Two phones that are both offline can each admit the same ticket — they can't see each other's scans until they sync. Once they do, the second shows up as a repeat.
- Refresh list pulls the latest guest list. Do it when you get signal, especially if people are still RSVPing.
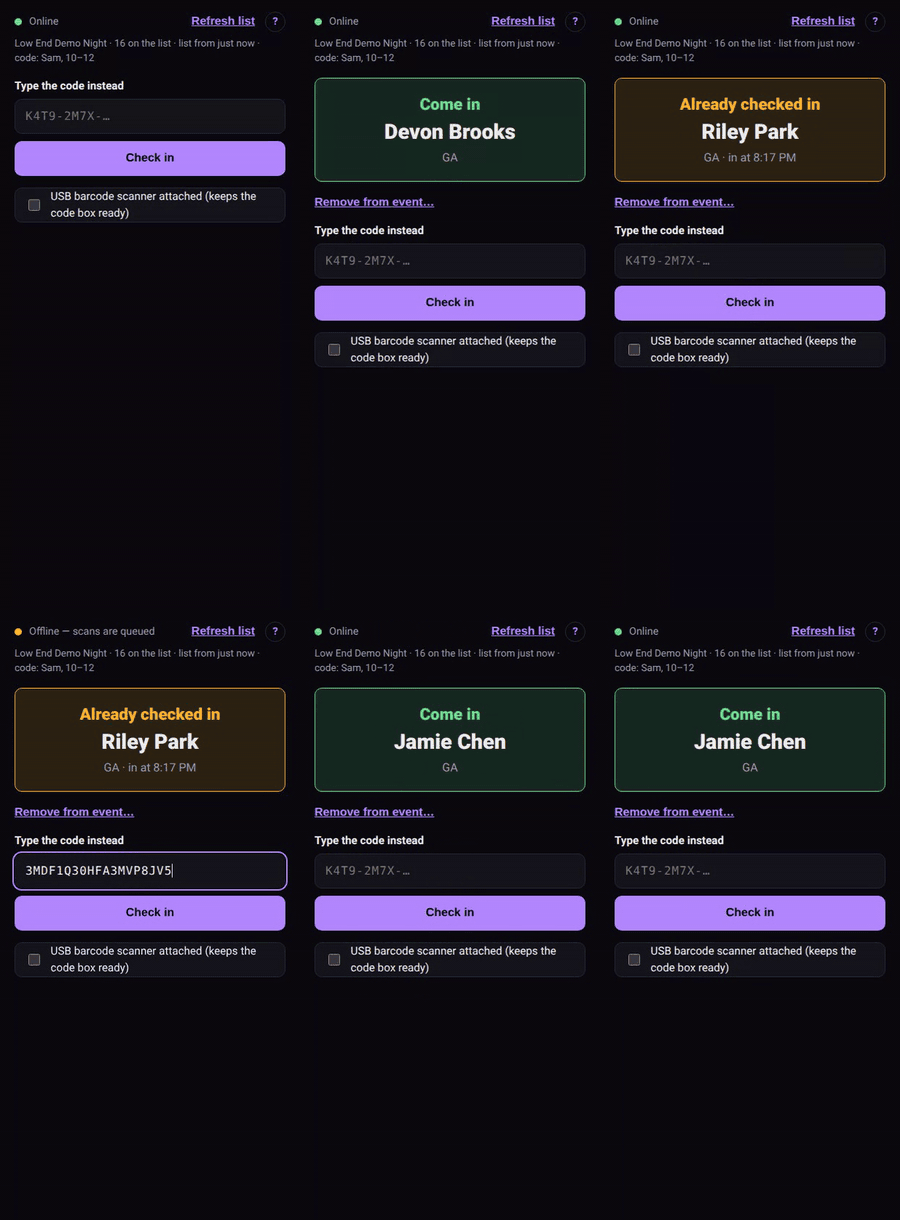 Losing signal mid-door, and the queue catching up.
Removing someone #
After a scan, Remove from event… takes that person out. Add a reason if there's time — only the promoter and crew see it. Their ticket then reads REMOVED — DO NOT ADMIT everywhere. See Keeping the space safe.
The door list #
The event page's Door list has everyone by name — who's arrived, who's a guest of whom, and your paid notes. Download CSV gives you a spreadsheet, for a paper backup. It never includes ticket codes, so a forwarded copy can't get anyone in.
The door list.
Give crew the one-page version: Door staff card.
10 · The door
Door staff card
One page for the crew: how to scan and what each result means. Print it.
Scan #
Point the camera at the QR on their phone. The screen tells you what to do.
What the results mean #
| You see | Do this |
|---|---|
| Come in (green) | Let them in |
| Already checked in · in at 10:42 | Check the name. Re-entry, or a shared screenshot? |
| Not on the list | Try typing the code. Still nothing: get the promoter |
| Ticket cancelled | Not valid tonight |
| Event cancelled | Not valid tonight |
| REMOVED — DO NOT ADMIT (red) | Don't let them in. Get the promoter if there's trouble |
Camera won't read it? #
Type the code under their QR into Type the code instead. Dashes, spaces and lowercase don't matter.
No signal? #
Keep scanning. The phone checks the list it saved and sends the scans when the signal's back. The top bar shows how many are waiting — don't clear the browser's data until it's back to zero.
Someone has to go #
After scanning them: Remove from event… → add a reason if there's time → Remove. They'll show as REMOVED at every door.
Phone swap at shift change #
The scanner shows whose door code it's on. Hand over the phone, or scan the next person's door code QR on theirs.
11 · The door
The merch-table tablet
A signup kiosk for your list that keeps working when the wifi doesn't.
A tablet at the merch table that puts people on your list — and keeps every signup when the venue wifi dies.
Make a signup link #
On Your list, under Signup links, pick what it's for:
- A tablet at shows — the kiosk. It shows a signup form big enough to use at arm's length, and a QR so people can sign up on their own phone instead of queueing for the tablet.
- A website, flyer or QR — a link you can print, post, or paste into your site. It comes with a snippet to embed the form in a page.
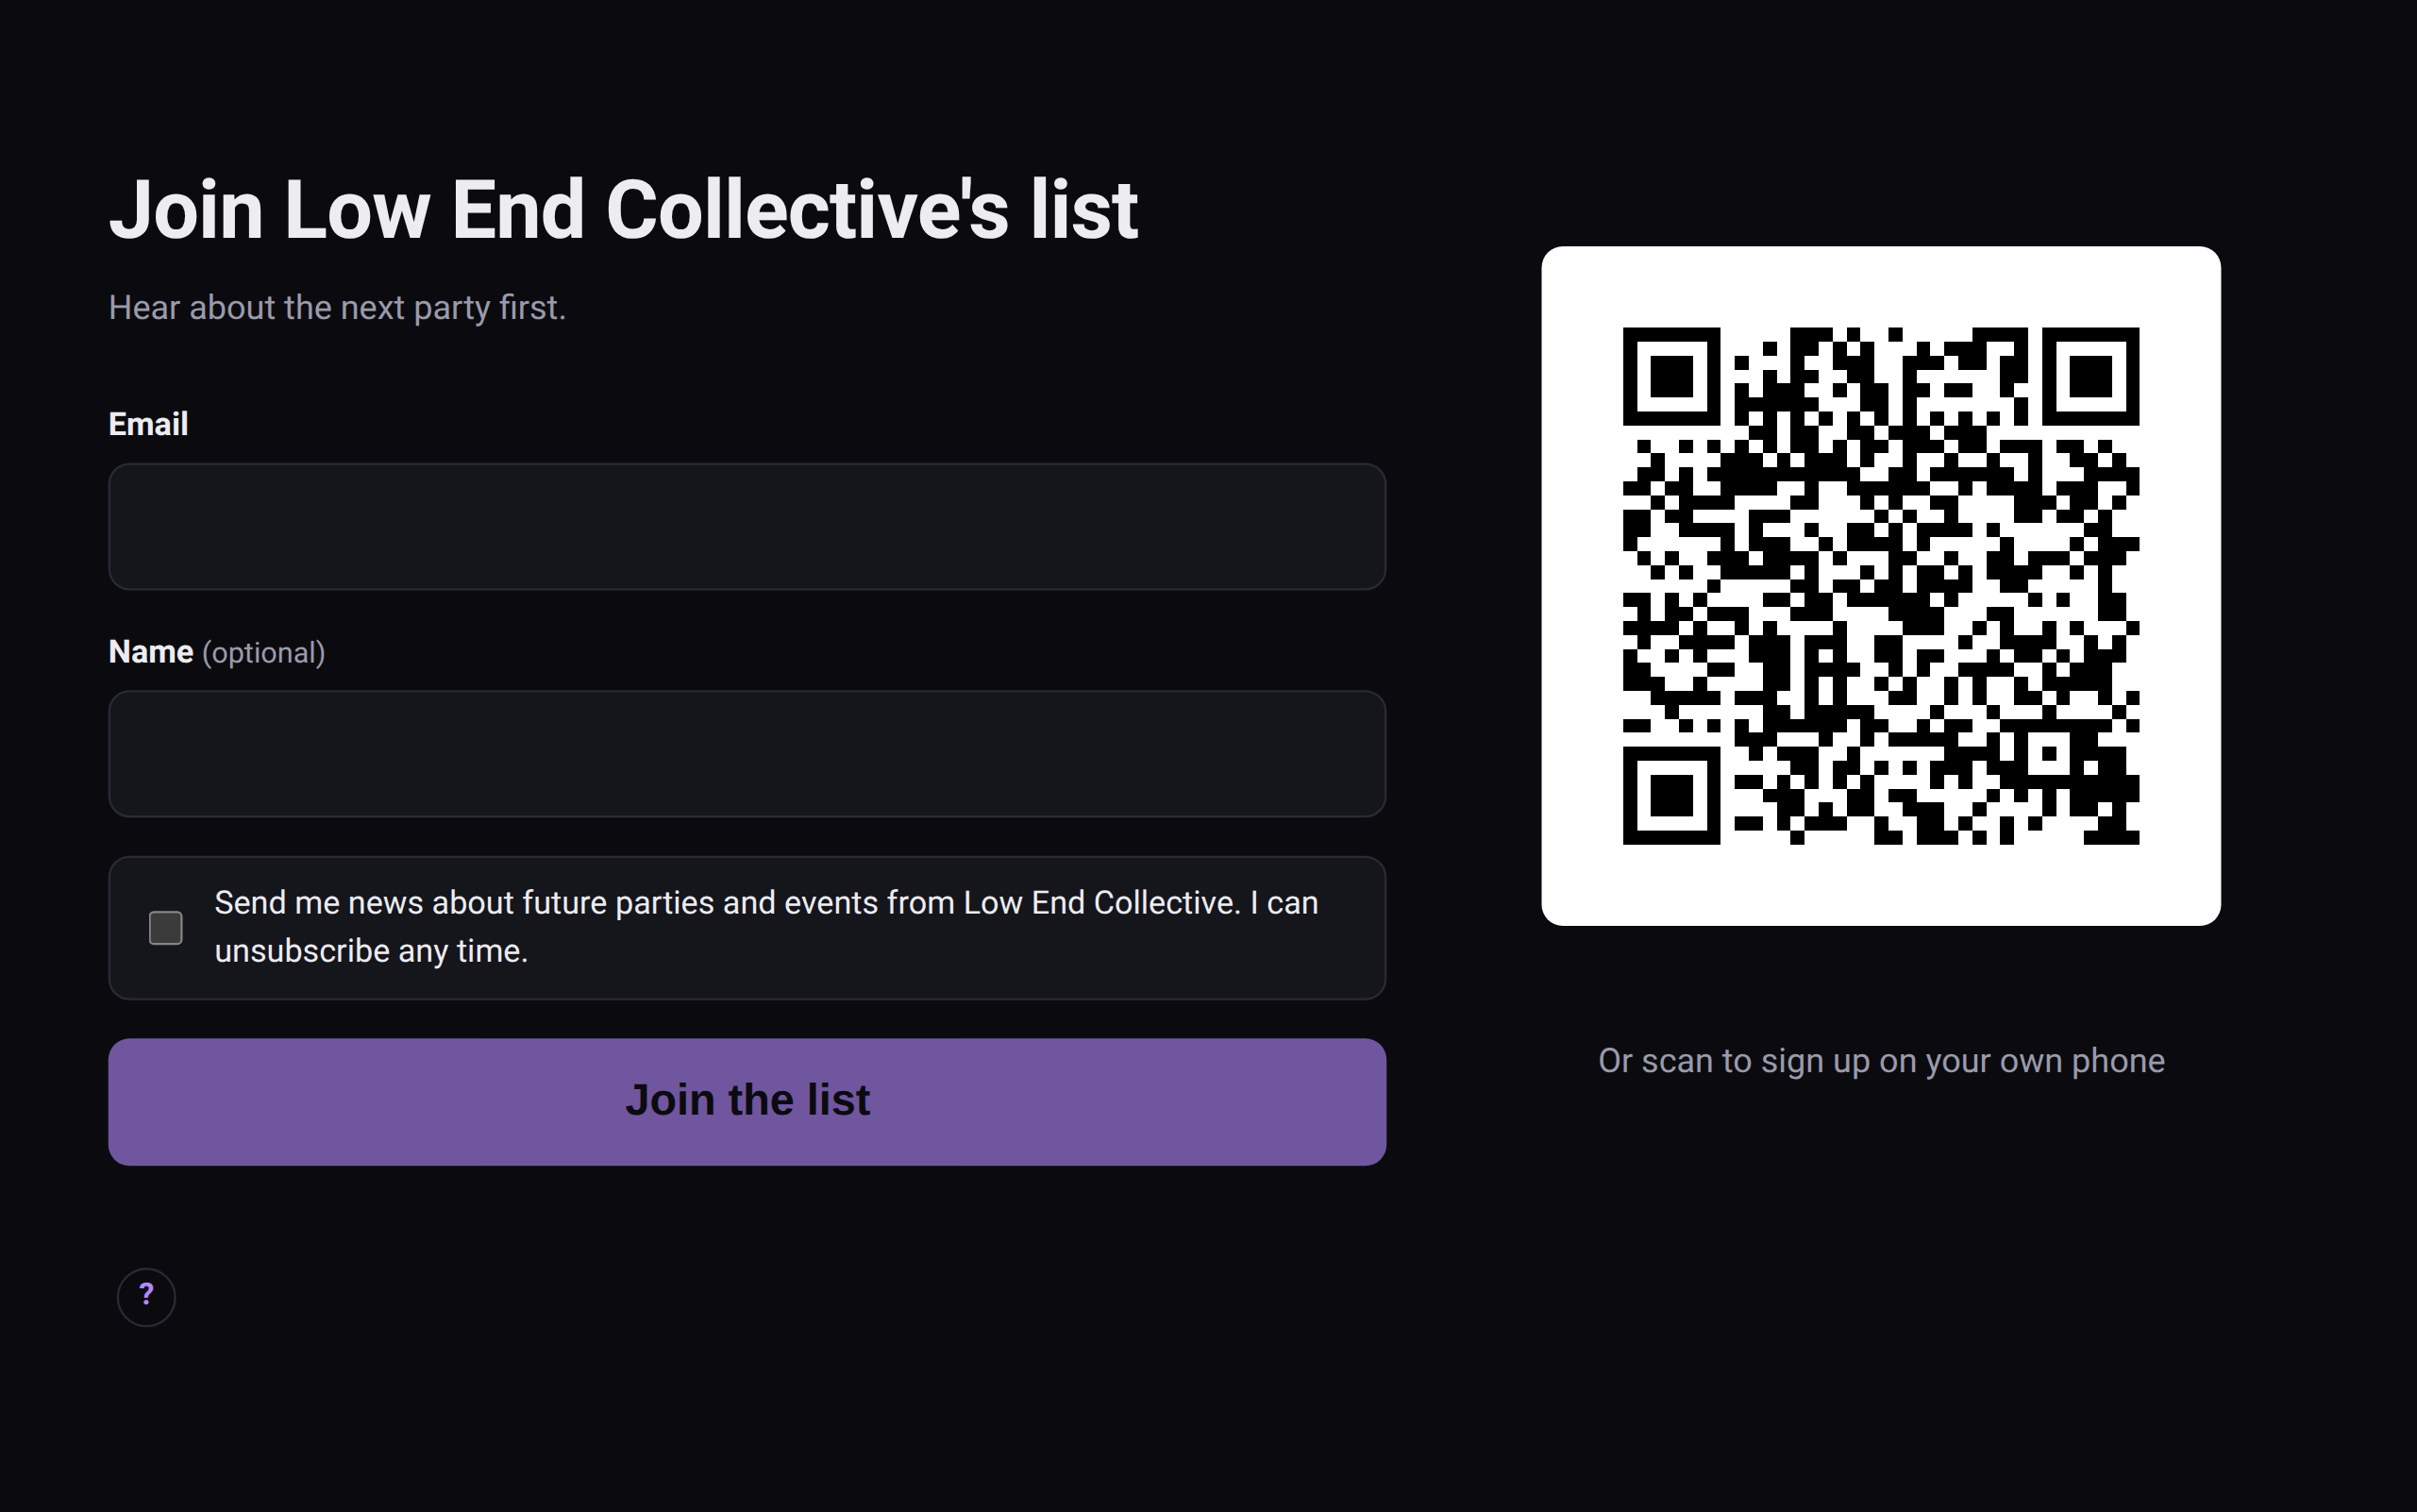 The merch-table kiosk. The QR lets people use their own phone instead.
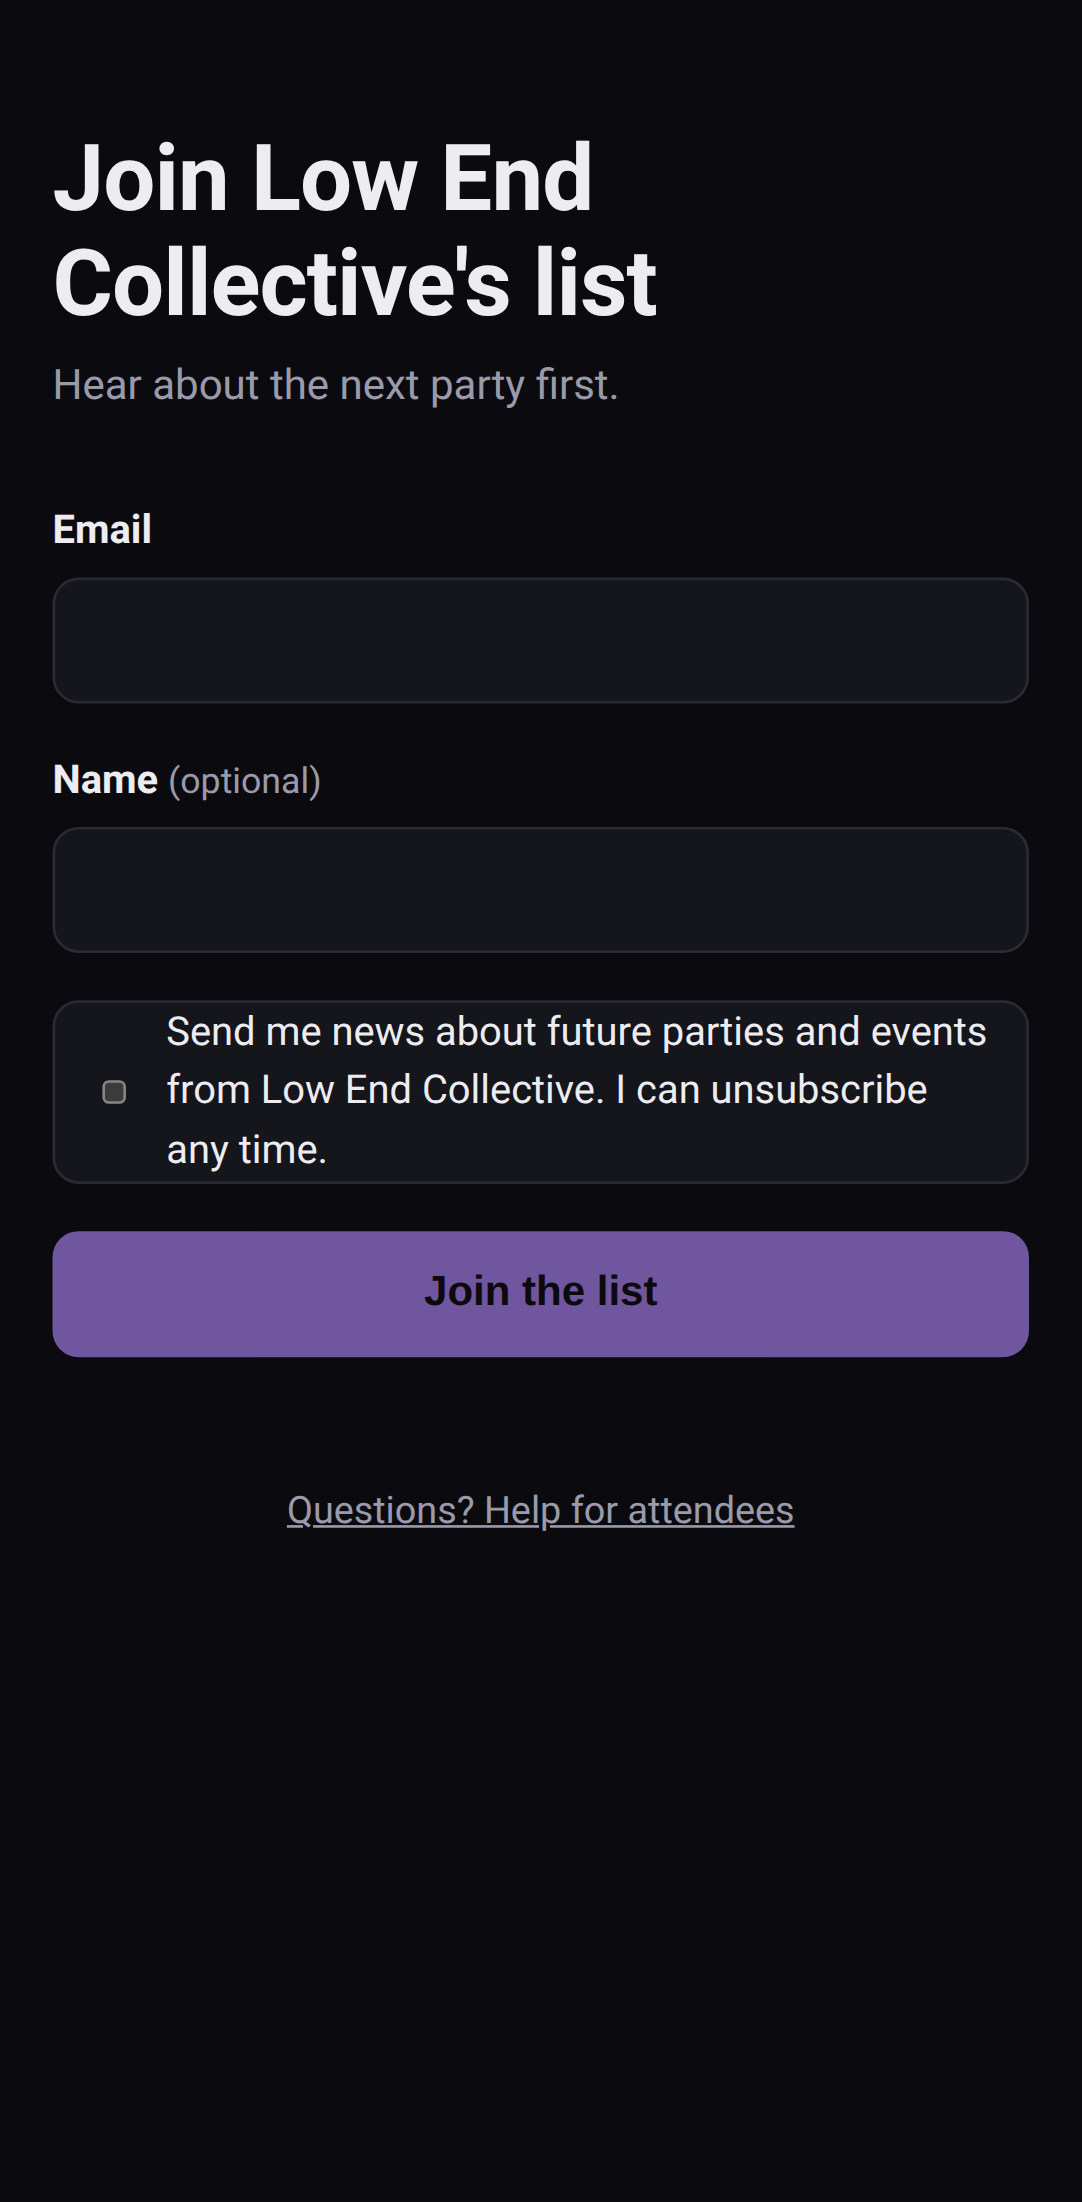 The web signup form, from a link or a QR.
The label you give it ("Tablet at shows", "tech-noid.net") is recorded as where each person agreed to hear from you.
Set up the tablet #
- Open the kiosk link on the tablet with signal. One visit saves it for offline use.
- iPad: add it to the home screen (Share → Add to Home Screen). Safari clears saved data after about a week otherwise — including signups that haven't been sent yet.
- Leave it open. It keeps the screen awake.
When the wifi dies #
Every signup is saved on the tablet first, then sent. With no signal they queue up and go out on their own when it's back. Nothing's lost if the page reloads.
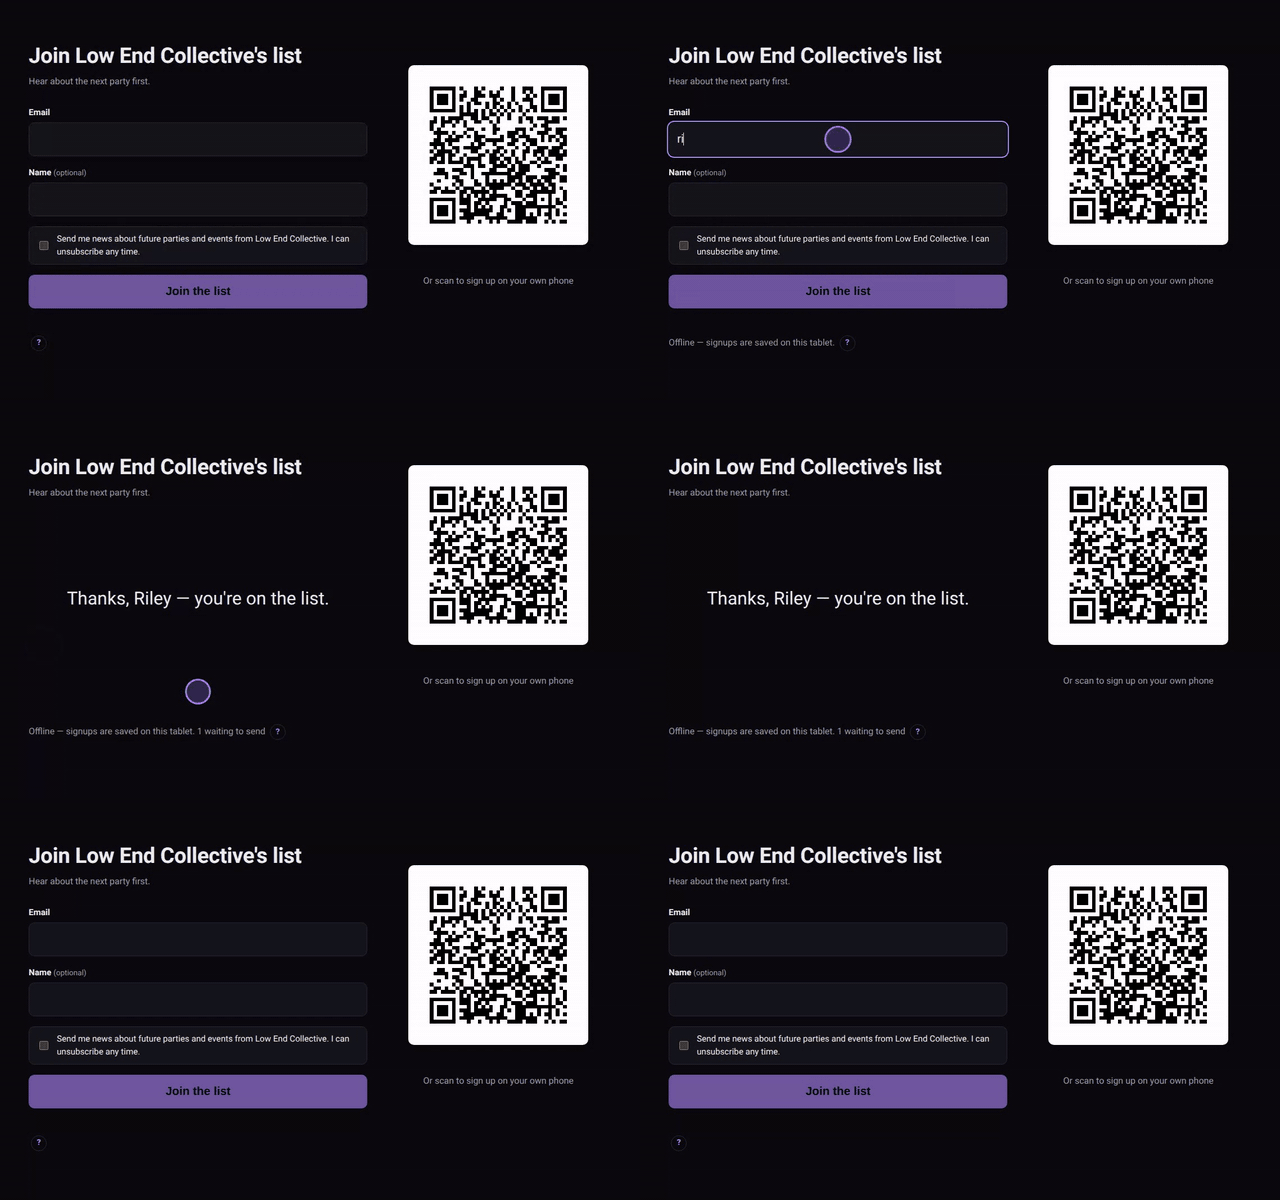 A signup with no wifi, sent when it comes back.
The QR on screen is a separate web link, not the kiosk's own — so nobody can scan it and run a kiosk of their own.
Consent #
Everyone who signs up ticks the box agreeing to hear from you — there's no signup without it. They land on your list as subscribed, with the kiosk's label as where they agreed.
Turning it off #
Turn off on a signup link kills it straight away, and a kiosk's QR stops working too. Make a new one if a tablet goes missing.
12 · Attendees
Help for attendees
No account needed. Where your ticket is, and what to do if it won't open.
Do I need an account? #
No. Pick a tier, type your name and email, and your ticket is on the screen. There's nothing to download and nothing to log in to.
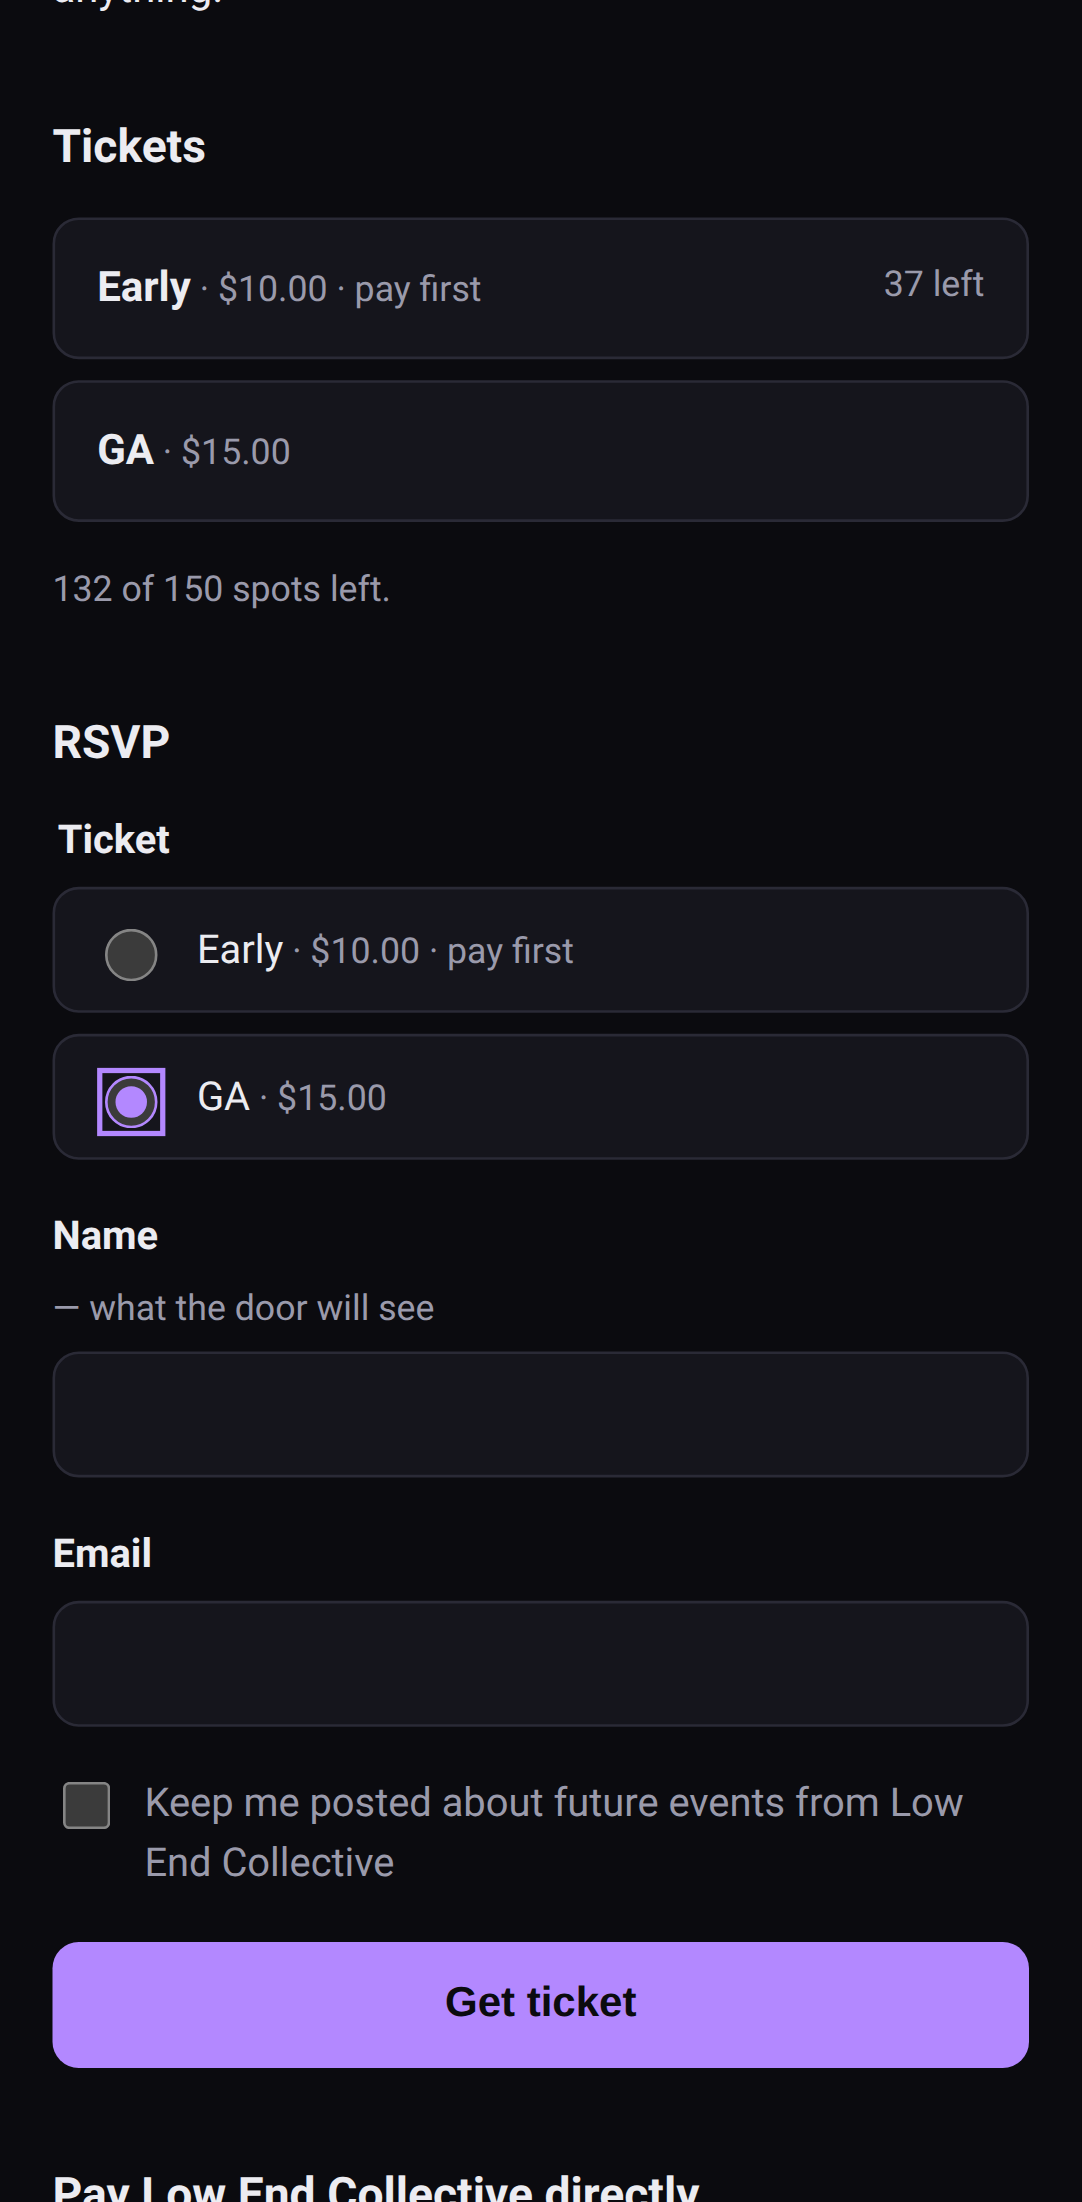 That's the whole thing.
Where's my ticket? #
On the page you landed on right after you RSVP'd — the QR code and a typed code under it. That page's address is your ticket, so:
- Save it. Bookmark it, add it to your home screen, or tap Save ticket to photos to keep a picture of it.
- Don't post it. Anyone with the link or a screenshot of the QR can use it, and it only gets in once.
My ticket won't open #
- No signal at the venue? If you've opened the ticket once before, it opens offline. A screenshot of the QR works too.
- Lost the link? Get in touch with the promoter. They can see you on their list.
- "This ticket is no longer valid" means the promoter cancelled or removed it. Talk to them.
The QR won't scan #
Turn your screen brightness up. If it still won't read, the door can type the code under the QR instead.
I RSVP'd but there's no ticket #
Some events are door only: tickets are sold at the door on the day. Your RSVP lets the promoter know you're coming and how many you're bringing. The page you land on after RSVPing is yours to keep. It has the details, and a button if you can't make it after all.
I paid — where's my ticket? #
Some tickets are pay first: the page says so before you RSVP. You get an order page with the amount and a short reference to put on your payment. Your ticket shows up on that same page once the promoter sees your payment and releases it. Keep the page, bookmark it or add it to your home screen, and check back.
A pay-first order page.
If the event starts or RSVPs close before your payment's confirmed, the hold lapses. If you'd paid, get in touch with the promoter and give them your reference.
I paid — where's my receipt? #
sekrit doesn't handle money. You paid the promoter directly through their own Venmo, PayPal or similar, so the receipt is in that app. Refunds come from the promoter the same way.
Why can't I RSVP? #
The page says why, plainly:
- "This event is at capacity" — the room is honestly full.
- "RSVPs are closed" — the promoter has stopped taking RSVPs, usually because doors are open.
- "This event was cancelled" — it's off.
- "You can't RSVP to this event. Contact the promoter." — talk to the promoter.
There are no invite codes, queues or lotteries. If there's room and RSVPs are open, you're in.
How do I stop getting emails? #
You only get them if you ticked the box to hear about future events. Every message from a promoter should have a way to unsubscribe. If it doesn't, ask the promoter directly — they can take you off their list.
13 · Running sekrit
FAQ and glossary
What sekrit will and won't do, and what the words mean.
What sekrit won't do #
Two rules, and they don't bend:
No gatekeeping. No invite codes, approval queues, lotteries, randomised waitlists or "you need to know someone". If you've got the link and there's room, you can RSVP. Capacity is the real number — never padded to make it look scarcer.
Never in the flow of funds. sekrit doesn't take payments, hold money or pay anyone out. Money goes from the attendee straight to the promoter, through the promoter's own accounts.
Common questions #
Is it free? #
It's open source. Run your own copy for nothing — see Run your own copy. sekrit takes no cut of ticket money, because it never touches ticket money.
Can I make an event invite-only? #
No — that's the first rule. An unlisted event is reachable by link only, so it won't turn up anywhere you didn't share it. Artists and crew can have their own guest lists, but a published event always keeps a tier anyone with the link can RSVP to.
Can I stop a specific person coming? #
Yes. Removing or blocking one person for something they did is safety, not gatekeeping. See Keeping the space safe.
What if the venue has no signal? #
The door and the merch-table tablet both work offline once they've been opened with signal. See Run the door and The merch-table tablet.
Who owns the list? #
You. Download it any time from Your list. Only people who opted in are subscribed.
Glossary #
| Word | Means |
|---|---|
| Tier / ticket type | A kind of ticket on an event — GA, Early Bird, Artist |
| Guest-list tier | A tier that's hidden from the public page. Only you, or an artist from their list, can issue it |
| Guest list | Spots you give an artist or crew member, with a private link to fill them |
| Door code | What turns a crew phone into the scanner for one event |
| Signup link | A link, QR or tablet kiosk that puts people on your list |
| Payment link | Your own Venmo, PayPal, Stripe or similar, shown on the page and tickets |
| Draft | An event nobody can see yet |
| Unlisted | Published, but only reachable by its link |
| Close RSVPs | Stop new RSVPs without cancelling anything |
| Removed | Taken out of an event for safety. The door won't admit them |
14 · Running sekrit
Run your own copy
docker compose up, a domain, backups and updates.
sekrit runs anywhere Docker runs — a VPS, an old box under a desk, a Raspberry Pi. Images are built for amd64 and arm64.
Start it #
git clone https://github.com/IamMrCupp/sekrit.git
cd sekrit
cp .env.example .env
# set POSTGRES_PASSWORD and APP_DB_PASSWORD — generate each with: openssl rand -hex 24
docker compose up -d --build
Then browse to http://localhost:8080 and register the first promoter account.
Everything comes through one front door. Caddy routes /api/* to the API and the rest to the web app, so there's one origin and nothing else is exposed. The database sets itself up on start — there's no separate setup step.
Two database passwords. POSTGRES_PASSWORD belongs to the database owner, and only the short-lived migrate step uses it, to change the schema. The app connects with APP_DB_PASSWORD, as a role that can read and write rows but can't drop or alter a table. A bug in the app, or someone exploiting one, gets what the app can do, not everything the database can.
Put it on a domain #
In .env, set:
SITE_ADDRESS=tickets.example.comHTTP_PORT=80andHTTPS_PORT=443PUBLIC_URL=https://tickets.example.comENVIRONMENT=production
Point the domain's DNS at the box, and Caddy fetches a certificate on its own.
Production needs HTTPS. With ENVIRONMENT=production the login cookie only travels over HTTPS — over plain HTTP, login will look like it worked and then quietly fail.
.env.example lists every setting sekrit reads. If it isn't in there, it isn't configurable.
Back it up #
Everything that matters is in Postgres, plus the uploaded flyers. A nightly dump is enough for most people:
docker compose exec -T db pg_dump -U sekrit sekrit | gzip > sekrit-$(date +%F).sql.gz
Keep copies somewhere other than the box itself. Flyers live in the media volume — back that up alongside the database, because the database points at those files.
Test a restore before you need one. A backup you've never restored is a hope, not a backup. After restoring into a fresh database, run docker compose run --rm migrate so the app's role and its access are set up again.
Update #
git pull
docker compose up -d --build
The migrate step runs first, then the app starts. Take a backup first.
Updating from a version before September 2026? Add APP_DB_PASSWORD to your .env (openssl rand -hex 24). Compose refuses to start without it and tells you so.
These docs #
They ship with the app, so the help on your copy always matches the version it's running.